

Recent posts


#35
Client Projects & Tips – Tube Chassis / Re: Scope creep '69 Cougar
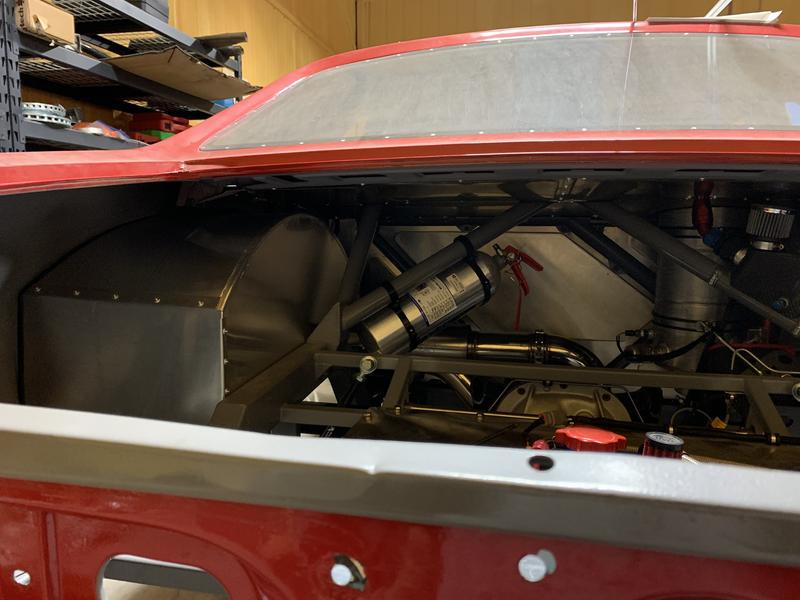
Last post by Ryan Kennedy - Apr 18, 2026, 02:46 AMSeems like a good time to talk about fire suppression! I went with a 10lb SPA Extreme Novec system. I would like to add a second system, but for now, this is what I have.
AFFF is the other common option, and is less expensive. Being a foam system, the chemical must be applied directly to the area on fire. Novec (3M) or FE-36 (Dupont's halon replacement) is deployed as a gas and moves around obstructions.
The SPA system I purchased uses a 5/16" rigid tubing of which they don't include nearly enough of so you'll end up buying more, but makes for a cleaner install. installation of the plastic coated AL tubing used in the AFFF systems I've seen, is much easier. The coated tubing bends by hand, and there's usually enough of it included with the system for the entire car if properly planned.
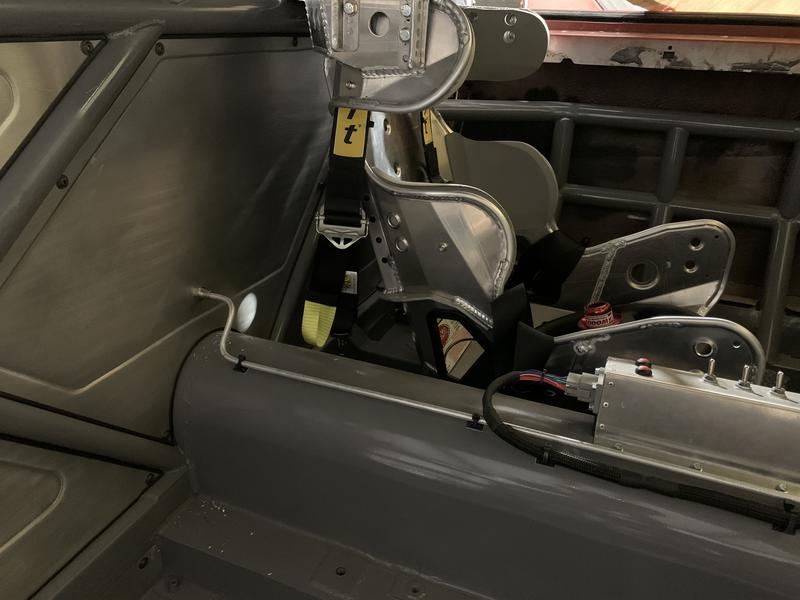
Despite the Cougar being a large car, real estate was running out. Bottle location was limited to the only available cage tube. Found a nice used pair of mounting brackets for about a quarter of what they are new.
Most manual systems only come with one pull cable so I had to find a place I can reach it belted in, as well as crew.
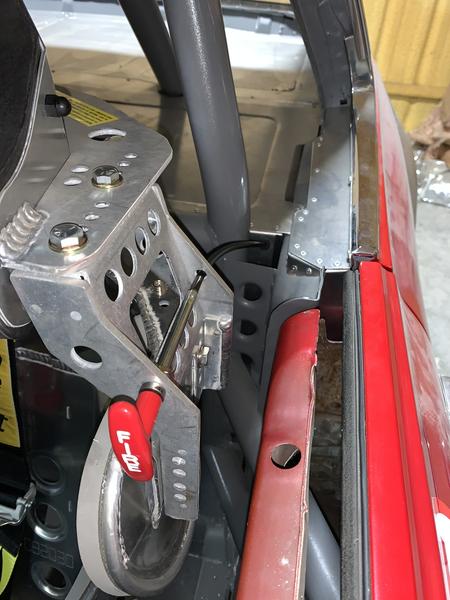
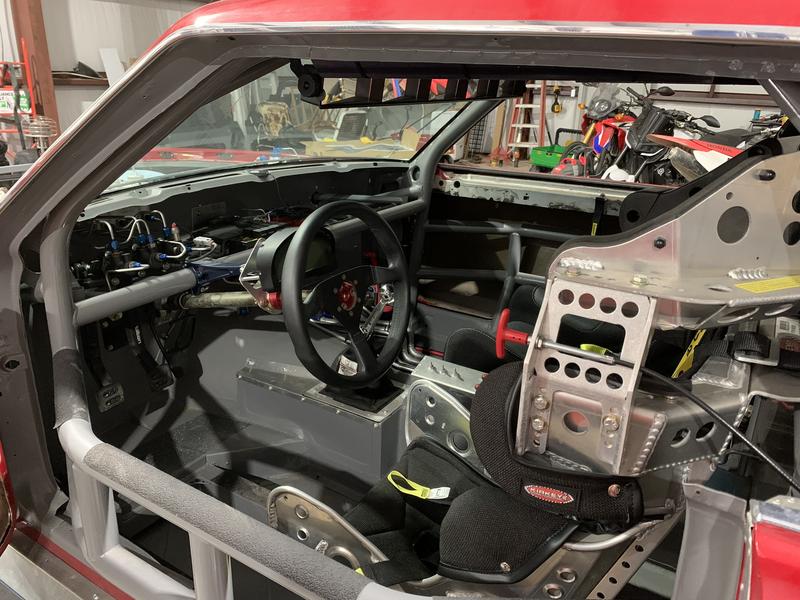
It may look awkward but I can reach it with either hand and have adequate force to pull and its easily used by crew. Side note - I changed away from the multi-angle wink mirror after the first drive and opted for a wide convex mirror. That kind of thing is personal, but the mounting of the wink mirror was difficult with my layout, and the vertical visual field felt limiting.
Now for nozzles. I system came with four nozzles. I pointed one at the top of the fuel cell, one at driver feet/legs, one at passenger legs and plumbing as a secondary, and the rear of the intake manifold.
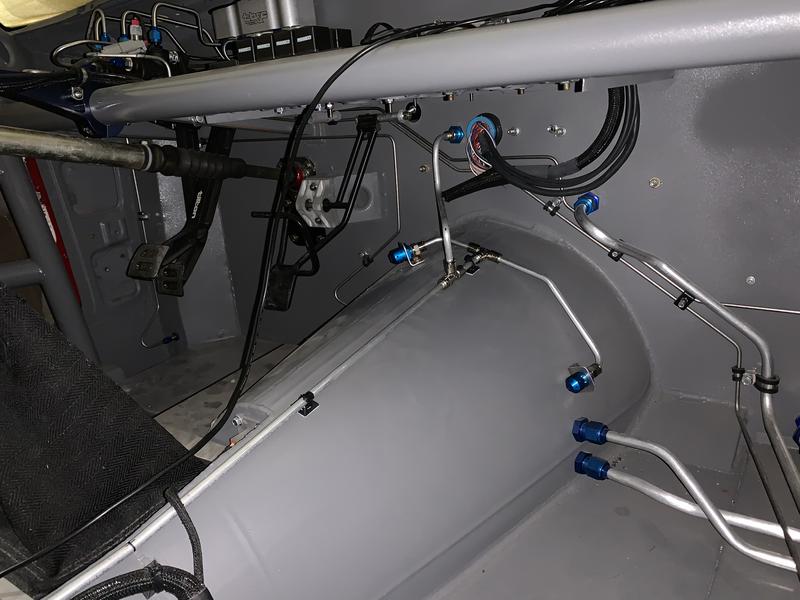
The fuel cell nozzle can be seen in my fuel system pics and you can see the backside of the engine bay nozzle in the interior.
AFFF is the other common option, and is less expensive. Being a foam system, the chemical must be applied directly to the area on fire. Novec (3M) or FE-36 (Dupont's halon replacement) is deployed as a gas and moves around obstructions.
The SPA system I purchased uses a 5/16" rigid tubing of which they don't include nearly enough of so you'll end up buying more, but makes for a cleaner install. installation of the plastic coated AL tubing used in the AFFF systems I've seen, is much easier. The coated tubing bends by hand, and there's usually enough of it included with the system for the entire car if properly planned.
Despite the Cougar being a large car, real estate was running out. Bottle location was limited to the only available cage tube. Found a nice used pair of mounting brackets for about a quarter of what they are new.
Most manual systems only come with one pull cable so I had to find a place I can reach it belted in, as well as crew.
It may look awkward but I can reach it with either hand and have adequate force to pull and its easily used by crew. Side note - I changed away from the multi-angle wink mirror after the first drive and opted for a wide convex mirror. That kind of thing is personal, but the mounting of the wink mirror was difficult with my layout, and the vertical visual field felt limiting.
Now for nozzles. I system came with four nozzles. I pointed one at the top of the fuel cell, one at driver feet/legs, one at passenger legs and plumbing as a secondary, and the rear of the intake manifold.
The fuel cell nozzle can be seen in my fuel system pics and you can see the backside of the engine bay nozzle in the interior.
#36
Designing & Tuning Aerodynamics for Track & Racing / Re: Designing & Tuning Aerodyn...
Last post by Ron Sutton - Apr 15, 2026, 02:27 PMEffects:
If you add aero aids & strategies to an existing car, be prepared to tune on your suspension as you achieve results. If the things you do "work" ... it will change the handling of the car, and therefore probably require suspension tuning.
If you increase downforce on the front end of the car, the suspension will compress more during braking & cornering. This will load & work the front tires more ... and more evenly. If the car was neutral before
... and the aero change is significant ... the car may now be loose in the corners. It may or may not go any faster until you add rear grip to balance the car. But when you do add grip to the rear of the car ... to match the increased grip in the front ... the car is going to be significantly faster in the corners, lowering your lap times.
If you design a car with all the aero aids & strategies right from the start, you will simply be tuning the suspension towards the optimum set-up from the start and won't notice this. If you make an "aero change" to the car ... and there was no noticeable effect to the handling or lap times ... what you did either didn't work, or maybe it did work, but there are conflicting effects. This is sometimes hard to see, feel & measure when your track days are a month apart.
But if you can make laps with something "on" ... then "off" ... then back "on" in the same day ... you'll really see the effects. We call this A-B-A testing.
At the level we raced at, it was easy to be confident in changes, because we had engineers on staff, data acquisition on the race cars & amazing drivers.
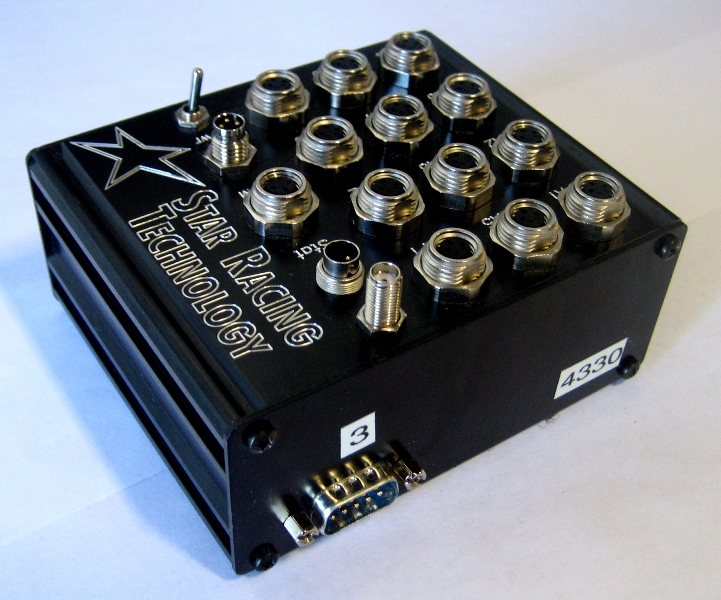
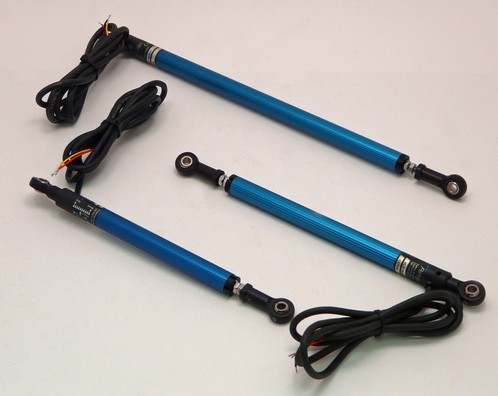
As far as accurately measuring the downforce gained or lift reduced (same difference) , we would take a baseline shock travel graph (showing all 4) & compare that to travel graphs as we tuned, or changed, aero features. We had our own data acquisition system (see photo) and utilized Penny & Giles linear potentiometers ... which is a fancy way of saying we used very high quality travel sensors on the shocks. They were very consistent & accurate.
If we made a change in the front to increase downforce, or decrease lift, we could see how much it compressed the front end more. Of course you know this amount of downforce varied with speed.
So in a slower corner we may have seen:
.150" more compression, of 350# front springs (x2) x .70 MR and know we gained 63# of net front downforce.
While in a faster corner, the front compression was:
.250" more ... so we knew we gained 122.5# of net front downforce there. This is enough gain that it made the car turn so much better the car actually got loose. So we would increase the rear downforce to balance the car out. We may change wing angle, spoiler angle or wicker bill height to achieve aero balance.
In the same slower corner we would see:
.050" more compression, of 600# rear springs (x2) x 1.0 MR ... and know we gained 60# of net rear downforce.
While in a faster corner, the rear compression was:
.100" more ... so we knew we gained 120# of net front downforce there.
* You'll notice the gains are not always linear when comparing downforce gains front to back ... just
close.
----------------------------------------------------------------------------------------------------------------------
BUT ... I need to make this clear. We did NOT tune the car based on data numbers. We tuned the car based on driver feedback. Realize we had VERY good drivers with amazing feedback skills. Drivers
that can tell the difference in 1/16" of suspension travel, tell you if one corner is touching the bump stop before the other, notice if a tire is ½ pound low and/or tell you if you have excessive lash in the ring &
pinion. No exaggeration. None. Not even a little bit. So we had complete confidence in the driver's feedback & tuned accordingly. We just used the data to learn & recreate that set-up at a later date.
But I don't feel it's necessary for rookie drivers without data acquisition systems to avoid aero. Just the opposite. Aero is a great learning tool. When you can make some track runs ... then bolt on your new splitter & go run it ... learn to feel the difference ... and see what the stop watch says ... that's a win-win. If, as a rookie driver, you are not sure if it improved or not after a run ... do A-B-A testing of things as outlined above ... then not only will you learn as a driver, but the car will gain grip & go faster too.
My strategy is do things to improve front tire grip with front aero ... then tune on rear aero to balance the handling. If you run out of rear aero adjustment, you can use mechanical adjustment to balance the
car ... but only to a small degree. This is NOT ideal, as mechanical adjustments to increase rear grip gain in reverse of aero adjustments.
What I mean is ...
If we put a taller wicker bill on the rear spoiler to add more rear grip (to balance the car from the added front grip) ... both ends of the car will have more grip as speed increases. If we have to use a mechanical grip adjustment in the rear, we can increase rear grip on higher speed corners, while reducing rear grip on lower speed corners ... or ... increase rear grip on lower speed corners, while reducing rear grip on higher speed corners. But with most adjustments we can't increase rear grip in both low & high speed corners "mechanically".
This is why it's important to achieve aero balance. And this makes another case for why aero downforce is so valuable. It increases the meaning more downforce on the faster corners, where you need it
more.
Track Guys ... I do not feel that we have to have engineers, data acquisition or professional drivers to gain from aerodynamics. Sure, engineers, data acquisition or professional drivers is the proven method to accurately quantify downforce. But they are not necessary. As a Driver, if you make changes and feel the car is better stuck, that is all that is required. I suggest your game plan be: Work on gaining front downforce to turn better, then balance it with rear downforce.
If you add aero aids & strategies to an existing car, be prepared to tune on your suspension as you achieve results. If the things you do "work" ... it will change the handling of the car, and therefore probably require suspension tuning.
If you increase downforce on the front end of the car, the suspension will compress more during braking & cornering. This will load & work the front tires more ... and more evenly. If the car was neutral before
... and the aero change is significant ... the car may now be loose in the corners. It may or may not go any faster until you add rear grip to balance the car. But when you do add grip to the rear of the car ... to match the increased grip in the front ... the car is going to be significantly faster in the corners, lowering your lap times.
If you design a car with all the aero aids & strategies right from the start, you will simply be tuning the suspension towards the optimum set-up from the start and won't notice this. If you make an "aero change" to the car ... and there was no noticeable effect to the handling or lap times ... what you did either didn't work, or maybe it did work, but there are conflicting effects. This is sometimes hard to see, feel & measure when your track days are a month apart.
But if you can make laps with something "on" ... then "off" ... then back "on" in the same day ... you'll really see the effects. We call this A-B-A testing.
At the level we raced at, it was easy to be confident in changes, because we had engineers on staff, data acquisition on the race cars & amazing drivers.
As far as accurately measuring the downforce gained or lift reduced (same difference) , we would take a baseline shock travel graph (showing all 4) & compare that to travel graphs as we tuned, or changed, aero features. We had our own data acquisition system (see photo) and utilized Penny & Giles linear potentiometers ... which is a fancy way of saying we used very high quality travel sensors on the shocks. They were very consistent & accurate.
If we made a change in the front to increase downforce, or decrease lift, we could see how much it compressed the front end more. Of course you know this amount of downforce varied with speed.
So in a slower corner we may have seen:
.150" more compression, of 350# front springs (x2) x .70 MR and know we gained 63# of net front downforce.
While in a faster corner, the front compression was:
.250" more ... so we knew we gained 122.5# of net front downforce there. This is enough gain that it made the car turn so much better the car actually got loose. So we would increase the rear downforce to balance the car out. We may change wing angle, spoiler angle or wicker bill height to achieve aero balance.
In the same slower corner we would see:
.050" more compression, of 600# rear springs (x2) x 1.0 MR ... and know we gained 60# of net rear downforce.
While in a faster corner, the rear compression was:
.100" more ... so we knew we gained 120# of net front downforce there.
* You'll notice the gains are not always linear when comparing downforce gains front to back ... just
close.
----------------------------------------------------------------------------------------------------------------------
BUT ... I need to make this clear. We did NOT tune the car based on data numbers. We tuned the car based on driver feedback. Realize we had VERY good drivers with amazing feedback skills. Drivers
that can tell the difference in 1/16" of suspension travel, tell you if one corner is touching the bump stop before the other, notice if a tire is ½ pound low and/or tell you if you have excessive lash in the ring &
pinion. No exaggeration. None. Not even a little bit. So we had complete confidence in the driver's feedback & tuned accordingly. We just used the data to learn & recreate that set-up at a later date.
But I don't feel it's necessary for rookie drivers without data acquisition systems to avoid aero. Just the opposite. Aero is a great learning tool. When you can make some track runs ... then bolt on your new splitter & go run it ... learn to feel the difference ... and see what the stop watch says ... that's a win-win. If, as a rookie driver, you are not sure if it improved or not after a run ... do A-B-A testing of things as outlined above ... then not only will you learn as a driver, but the car will gain grip & go faster too.
My strategy is do things to improve front tire grip with front aero ... then tune on rear aero to balance the handling. If you run out of rear aero adjustment, you can use mechanical adjustment to balance the
car ... but only to a small degree. This is NOT ideal, as mechanical adjustments to increase rear grip gain in reverse of aero adjustments.
What I mean is ...
If we put a taller wicker bill on the rear spoiler to add more rear grip (to balance the car from the added front grip) ... both ends of the car will have more grip as speed increases. If we have to use a mechanical grip adjustment in the rear, we can increase rear grip on higher speed corners, while reducing rear grip on lower speed corners ... or ... increase rear grip on lower speed corners, while reducing rear grip on higher speed corners. But with most adjustments we can't increase rear grip in both low & high speed corners "mechanically".
This is why it's important to achieve aero balance. And this makes another case for why aero downforce is so valuable. It increases the meaning more downforce on the faster corners, where you need it
more.
Track Guys ... I do not feel that we have to have engineers, data acquisition or professional drivers to gain from aerodynamics. Sure, engineers, data acquisition or professional drivers is the proven method to accurately quantify downforce. But they are not necessary. As a Driver, if you make changes and feel the car is better stuck, that is all that is required. I suggest your game plan be: Work on gaining front downforce to turn better, then balance it with rear downforce.
This forum is open to ask questions about aerodynamics now.
#37
Designing & Tuning Aerodynamics for Track & Racing / Re: Designing & Tuning Aerodyn...
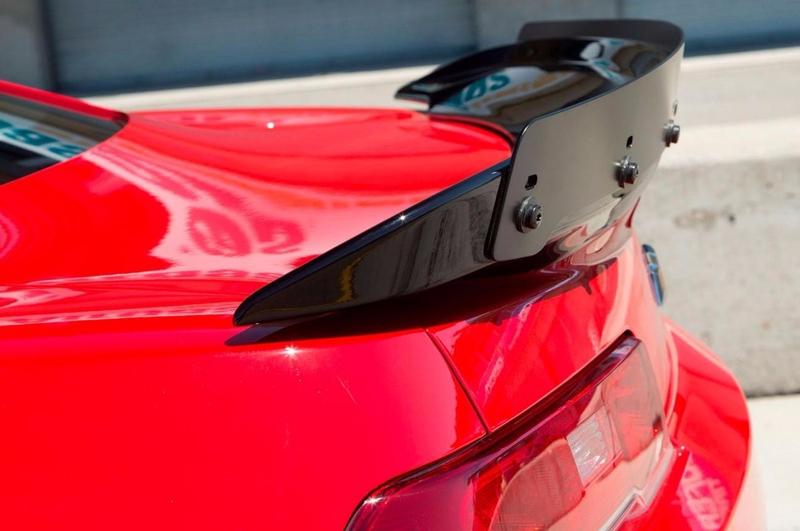
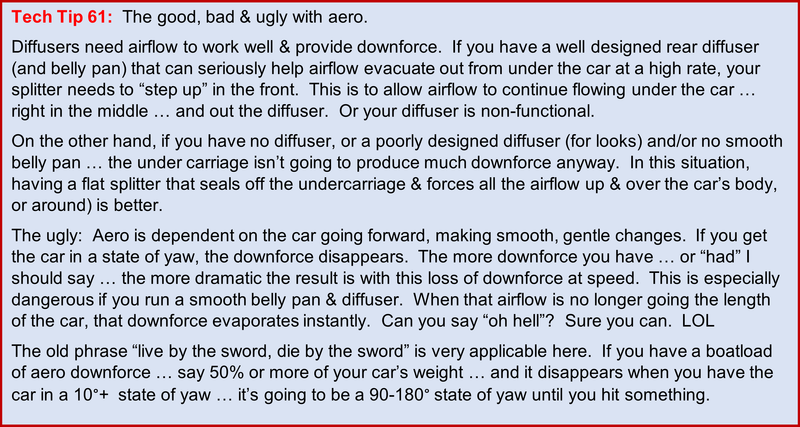
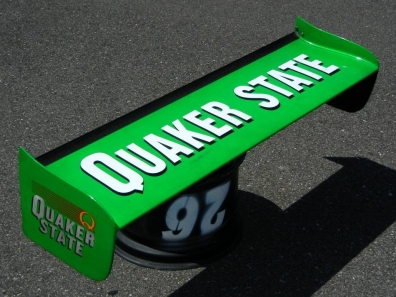
Last post by Ron Sutton - Apr 15, 2026, 02:21 PMRear spoilers ... work like a wickerbill:
Remember, the deck lid is where the downforce is pushing on the car, when you're utilizing a traditional spoiler at any angle above 45°. The spoiler itself is just a big wicker bill. The taller it is ... and/or the
steeper the angle ... the more downforce will be created ... along with more turbulence & drag. If you lay the spoiler down more, the spoiler itself starts to become part of the deck lid surface the airflow is
pushing down on.

Just like wings, spoilers can have wicker bills too. It is not uncommon on road race, oval track & drag cars to see wicker bills being utilized to slow the boundary layer of attached airflow down for increased downforce. I am a fan of this strategy, because it allows the main spoiler angle to be less, while maintaining the same downforce. This combination produces less drag & less turbulence behind the car.
Let's classify the two spoiler strategies as Circle Track & Drag Racing. Circle Track spoilers may be 4" to 6.5" tall, but often at 45° to 70° angles. So they act as big wicker bills to slow the air over the deck
lid, but don't add much to the effective deck lid area. Drag Racing spoilers can be 10" to 14" long and add significant surface area for downforce to be created ... due to their low to zero angle ... but don't
slow the air down much. They can & do utilize wicker bills to affect the boundary layer & slow the airflow speed.
Side plates work on spoilers just as they work on wings. Depending on design, they keep the airflow on the deck lid and/or spoiler surface & act as a rudder ... helping to hold the car in place.
For Track Cars, I am a fan of running:
• As large of a rear spoiler or wing as I can run
• At a relatively low angle
• Designed for quick & easy spoiler angle adjustment
• Well supported for zero energy loss
• With side plates as large as I can run
• And a removable wicker bill (to run different height & angles)
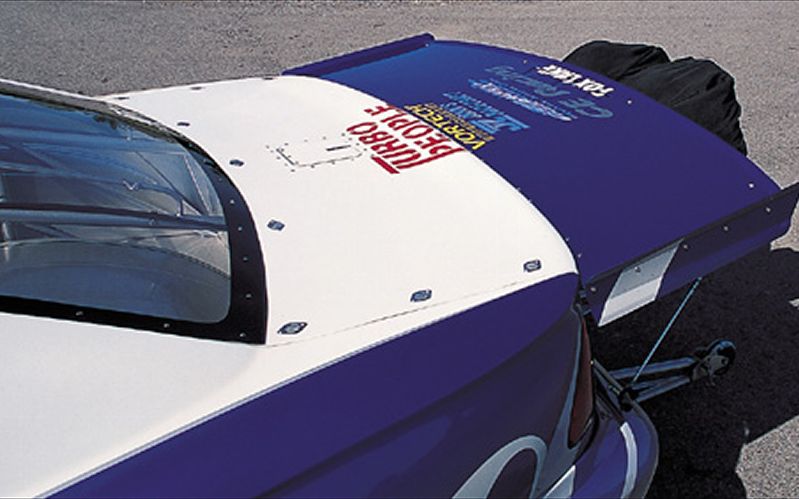
Roof & rear glass spill plates:
The thin strips of aluminum you often see attached to outside area of roofs & rear windows on race cars are called spill plates. They act similar to the spill plates on wings & spoilers, in that their role is to
keep the boundary layer of attached airflow in place. "In place" on the roof & back window achieves two key things. First is additional downforce in those areas. Second is the airflow is kept going the
direction needed to apply pressure & downforce on the rear deck lid & spoiler.
While we are in this area of the greenhouse, another goal is to keep the boundary layer of airflow going over the rear quarter windows ... attached ... so the air flows around the greenhouse and onto the deck
lid ... for more downforce.
Vortex Generators:
I worked directly with Gary Wheeler back in the 80's. He is the aerodynamicist that patented the Wheeler Vortex Generators & worked with Kenny Bernstein & other drag racers working on aero racing
projects. Vortex Generators are problem solvers. Vortex Generators do what they name implies ... they generate vortices (the plural of vortex). Airflow swirling in controlled vortices follows shapes better. This is important.

If the rear glass turns down at too steep of an angle, from the roof, to keep the airflow attached ... Vortex Generators placed on the roof just before the steep turn down ... creates vortices in the airflow stream ... keeping the airflow attached & following the window. Before VG's ... the airflow was separating and coming rearward at downward angle "maybe" hitting the rear of the deck lid or spoiler ... for a "little" downforce ... before it crashed into the air coming out from under the car.
Now, with VG's in place, the airflow follows the rear glass ... then the deck lid & spoiler ... creating substantially more downforce. This also directs the air off the rear of the car at a more horizontal angle,
helping it to merge with the airflow from underneath the car smoother, for less turbulence & drag.
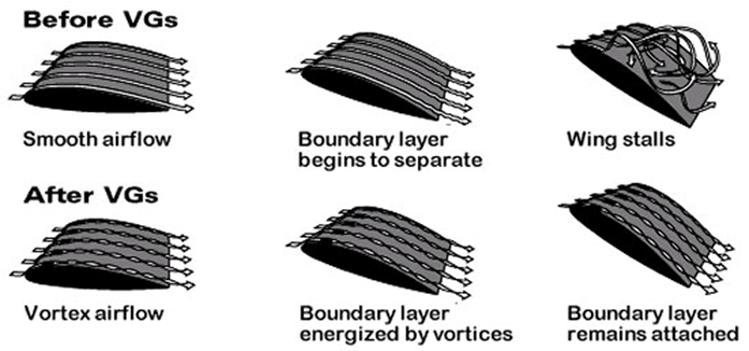
Another key problem they solve, is the normal tumbling, turbulent airflow where it separates from the rear of a vehicle. With VG's installed, the air exits in controlled swirling vortices ... instead of
tumbling ... which reduces the drag at the rear of the vehicle ... and smoothes out the merging of airflow with air from underneath the car.
For years Gary sold his Wheeler Vortex Generators to aircraft companies to put on the underneath leading edge of aircraft wings ... to increase lift ... and increase the cargo carrying capacity of planes. He sold them to racers that used them to fix aero flow problems or increase downforce. He sold them to normal commuters who used them to increase fuel mileage. Same to the trucking industry. Today, BMW, Subaru & others use vortex generators of their own design to aid aero flow on their sporty cars.
Gary no longer makes or sells the original Wheeler Vortex Generators.
He sold the patent to some good guys that run a company called Air Tab. The design is similar & different in key ways. Today, I use the Air Tabs the same way I used the Wheeler Vortex Generators. They must be placed just in front of where you want them to work. See them here.
Air Dams / Spoilers:
A front spoiler is typically an add-on piece partially for style & partially for function. They come in a gazillion shapes & dimensions. Many known as "chin spoilers" mount at a rake angle. An air dam is typically a vertical panel either added on, or built into, the nose bodywork of the car. The shape of this vertical panel typically follows the shape the nose bodywork. In racing, extender lips are often added to the air dam that can be adjusted to just touch the track to better seal off air.
Both air dams & front spoilers are designed to reduce airflow underneath the car, to reduce lift. Air dams are more effective at sealing the car's bodywork to the track, so they are capable of almost eliminating airflow getting underneath the front of the car in the corners. Spoilers don't usually get this low, nor cover all the way across the front of the car as well. For this reason, I think of spoilers as "under car airflow reducers" & air dams as under car airflow eliminators."
A well designed front spoiler or air dam reduces the volume of air getting under the car. This creates a low pressure area & vacuum effect to help hold the front end down through the corner. Front spoilers & air dams don't create downforce in the typical sense. They do so by reducing lift & creating a low pressure vacuum area, helping to suck the front of the car down to the track.
A well designed front spoiler or air dam ... combined with a sizable splitter ... reduces lift, creates a low pressure vacuum area ... and adds downforce on the splitter ... creating more net downforce than the
spoiler or air dam would create on their own.
Splitters:
Attach at the front of the car, under the air dam or nose bodywork, and have a flat surface typically ranging from 1-5" running parallel with the ground line. Their role is to split the airflow that goes underneath the car ... from the airflow that goes up & over the hood or around the side of the fenders. Very short ones split the airflow to a degree ... and reduce lifting force ... but create very little downforce. This is a nice, solid gain in front downforce by reducing the lift. Short splitters can be
mounted without braces if well attached to the air dam or bodywork.
Longer splitters split the airflow more positively and create downforce on the front of the car. This is a big gain in front downforce, increasing front tire grip, making the car run flatter, improving turning ability,
increasing corner speeds. Because the airflow is actually putting downforce on the longer splitter, the splitter needs supports to prevent it from buckling under.
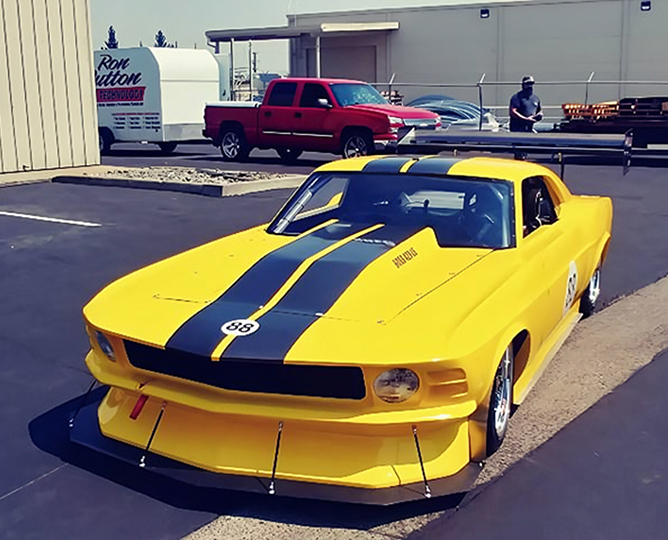
If you want your Track Car to be seriously fast, adding a quick on/off splitter you can run at the track is a big gain. Take it off to load in the trailer and just put it back on for track activity.
Rake:
Simply lowering the front of the car ... relative to the rear of the car ... helps reduce lift in two ways. First, it reduces the opening at the front of the car, reducing the volume of air that can get underneath the car to start with. Second, the larger opening in the rear of the car makes it easier for this smaller volume of air to get out.
I've seen guys drop the nose ½" in ride height in the front and increase the front tire grip a TON. Partially because it reduced lift & partially because it shifted weight balance, physically loading the front
tires more & the rear tires less.
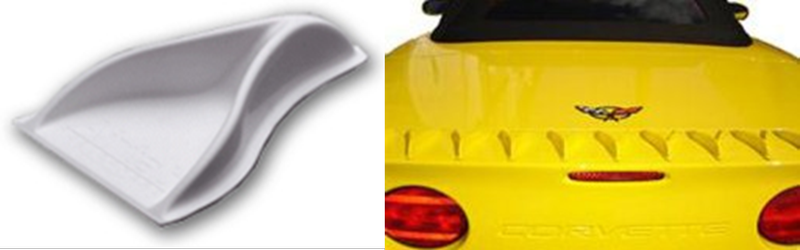
Ground Effects Rocker Panels:
A high volume of air flows down the sides of the cars. For decades, car body styles had the doors & fenders shaped to roll under at the bottom. This contributes to air below the beltline (mid door) to rolling
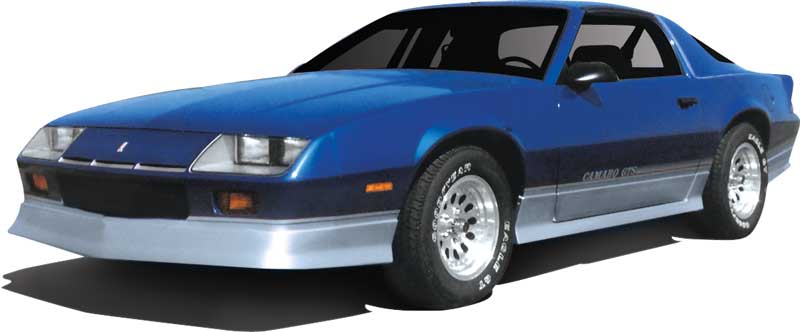
under the car and adding lift. In the 80's ground effects rocker panels were added to the doors & fenders of cars like the Camaro, Trans Am & many production sporty cars. It was partly for style, but worked
functionally to prevent this airflow down the side from rolling under the body & adding lift.
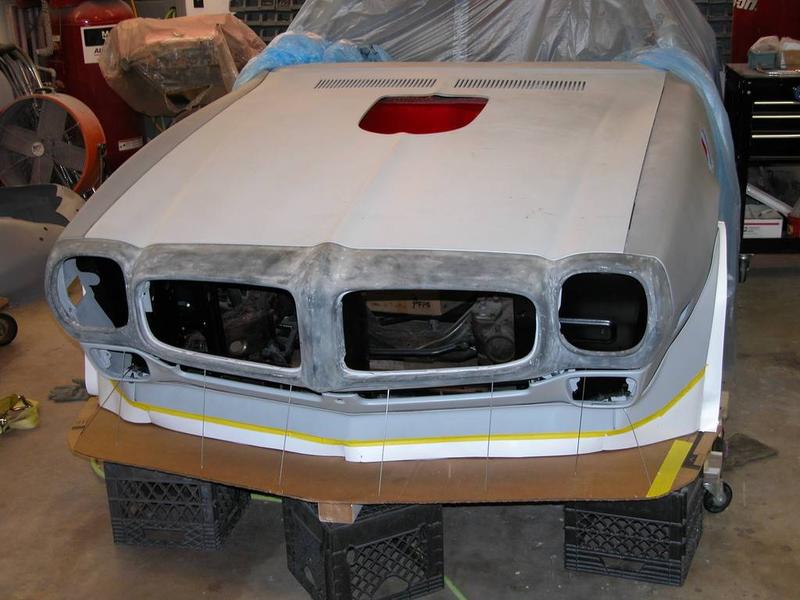
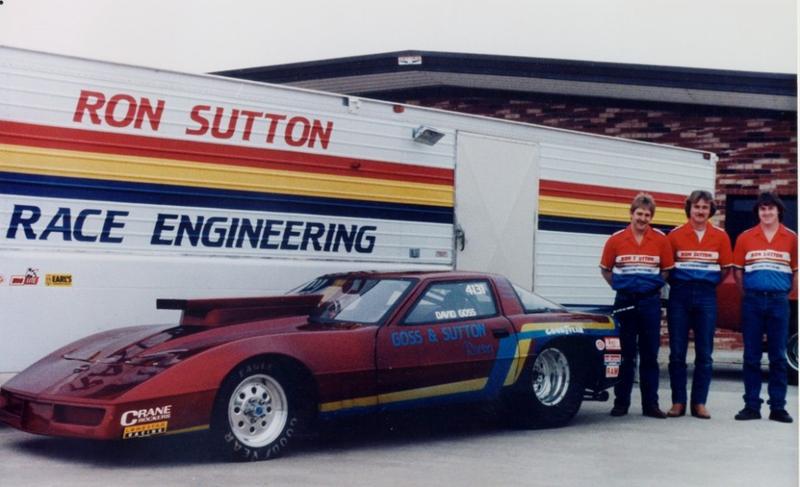
I was in drag racing at that time & if you were building a serious Pro Stock car, you didn't consider a body style that didn't come with ground effects. I had a customer who had me build him the new C4
Vette body when it came out in 1984. I tried to talk him out of it for logical, performance reasons, because that car had the worst "curve under" I'd seen in modern cars & no "factory" ground effects package was offered. He loved the look & had me build it anyway. As fortune would have it, we became racing partners down the road. I had to fix that problem & many other aerodynamic flaws in that body design, to make the car drivable & competitive.
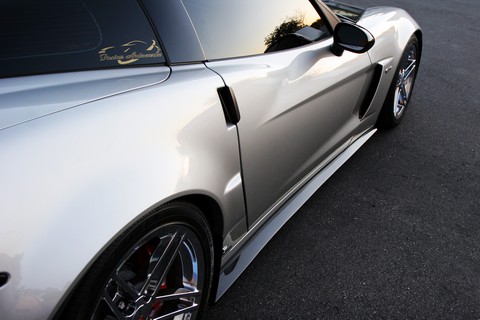
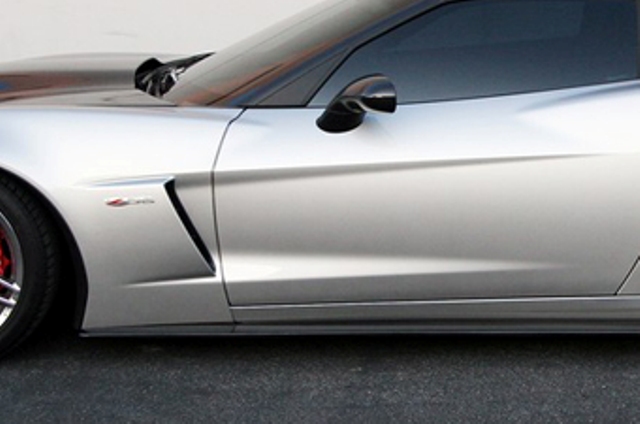
Side Splitters / Rocker Extensions:
For cars that don't have well designed ground effects on the rockers, adding side splitters or rocker extensions, is a very effective tool. A side splitter works similar to a front splitter, except they are on the side of the car. They are placed 90° to the body (or parallel with the ground, like a front splitter) and extend out anywhere from 1-3". The side splitter prevents airflow from rolling under the body. It splits the
air above it, creating a high pressure zone just above it. This reduces lift & adds net downforce, with minimal addition to drag.
Side Skirts:
Don't confuse side skirts with side splitters or rocker extensions. Side skirts are typically strips of rubber or plastic mounted vertical to the car from underneath. The purpose is similar, to prevent air from getting under the car. This is typically a street car or grass roots racer addition because the car is too high. You don't see this in most upper ends of racing, because we get the car as low as the rules allow, so there is no room, nor reason to use a rubber or plastic skirt.
Diffusers:
If designed correctly, diffusers help evacuate the airflow out from underneath the car faster, smoother & cleaner. As with everything, any time we speed up the airflow, we're reducing pressure. When the airflow is under the car ... speeding it up greatly reduces lift ... adding to the total net downforce achieved with the car.
The diffuser area increases in volume as it exits the car. This venturi effect helps suck the air from underneath the car. As the airflow exits the diffuser it is running slightly uphill ... helping to get it away from the turbulent track surface ... and easing its smooth transition with the airflow coming over the top of the body.
Proper shape of the diffuser roof is "gradual convex" so airflow will stay attached & follow. If you make the diffuser roof too tight of a radius, the airflow will detach & tumble, negating any gain. The vertical
dividers inside help channel the air. On cars where the diffuser has these on the outside, they're called vertical fences, with the goal of not allowing airflow from the side of the car's rear body to spill under &
disturb the airflow out of the diffuser.
Hood:
In most full bodied cars, especially if the car has more front weight bias, the hood is the single, most important area to achieve downforce. Fact: No full bodied race car can go faster (through the corners) than the front end has grip. To go faster, we need more front grip. Getting rear grip, especially with aero, is relatively easy compared to the front. The hood is our canvas. We want the hood to be as big, flat (or concave) & smooth. The windshield is effectively our "spoiler" that slows the air & creates a high pressure area. How much front downforce we can create will be determined by our front airdam/splitter & the hood/windshield. Let's devote serious effort to making these the best we can.
Hood Vents:
The aerodynamic goal with hood vents is to remove some of the pressure & lift under the front of the car. There are pros & cons, so there supporters & detractors. For hood vents to work well at reducing lift, the airflow needs to exit near the front of the hood. This disrupts the airflow over the hood. Does the reduction in lift offset the loss of downforce on the hood? I don't think it can be stated one way or another "for sure" without testing the effectiveness of the hood vent design & its impact on airflow across the hood.
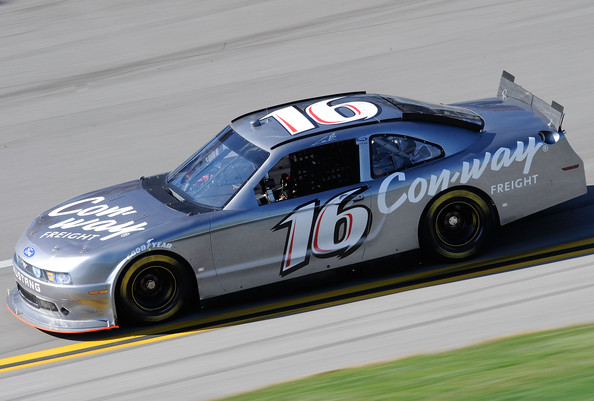
Several auto manufacturers have made the hood vent a major & successful part of their race car design, such as the BMW Z4 GTE cars. I believe the key to their success with this design is how they blend the hood vents, hood structure & windshield angle together. That is a very successful car that no doubt took some serious wind tunnel & track time to develop.
I'm positive any of us can make a hood vent system work well & remove air pressure & lift from under the front of the car. I am concerned the project of getting the airflow to work in harmony with airflow over the hood & windshield may be outside the resources for most of us.
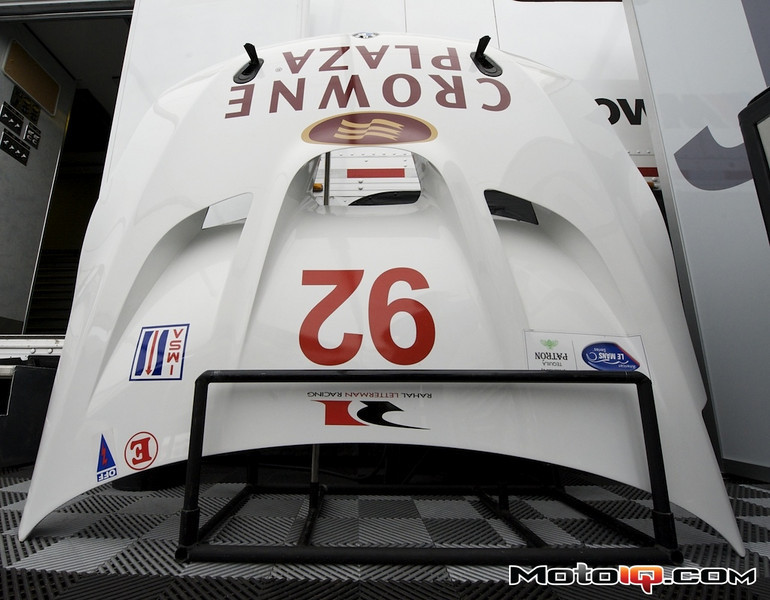
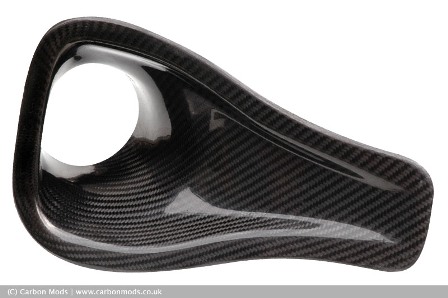
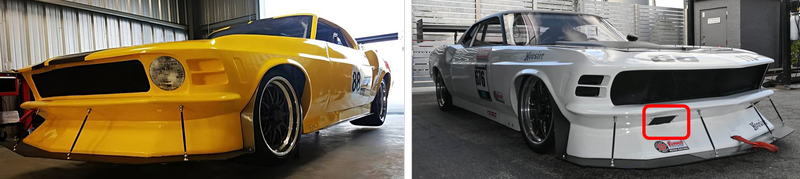
Side Vents / Front Fender Vents:
On the other hand ... utilizing side vents in the front fenders to remove excess air pressure from under the car ... to reduce lift ... and to extract hot air from engine compartment ... makes a lot of sense. It is much simpler, with less challenges and relatively easy to achieve success with. First, you're not disrupting airflow that provides downforce ... as the boundary layer of airflow over the hood does. Here are two examples of ducting the hot air out of the engine compartment. One minor, one extreme.
You are causing airflow detachment on the side of the fender, but if the side vent is designed almost parallel with the fender, this will be minor & the airflow can reattach itself as it flows down the side of the door. Regardless, any minor loss of side force is inconsequential compared to the significant gains in down force by reducing lift under the front end.
Tires:
Tires have a horrible aerodynamic shape & they're rotating at high speeds with disturbs the airflow even more. Having tires exposed hurts air flow. A little F1 trivia: F1 cars have pretty high coefficient of drag
numbers. Higher than most people think ... around .75+. This is because of the exposed tires, wings & other aero aids adding to the drag. But they don't run Bonneville ... so downforce makes them faster
on the twisty tracks they run.
Fender Lips:
In race series that allow, knowledgeable teams utilize short fender lips on the leading edge of the fenderwell to detach the airflow out away from the tires. These look like short, wickerbills curved to match the radius of the fenderwell. They only go on the front & slightly curve up to the top of the fenderwell opening. Some teams install these lips at 90° to the body surface, but 75-80° works better.
In the rear of the fenderwell opening, knowledgeable teams create an inner lip, that curves in from the fender. They extend in several inches with the goal of keeping airflow out of the tires inner fender area.
Some teams install these lips at 90°, but again 75-80° works better.
Fender openings:
In race series where teams can't run any fender lips, the teams often pull the front of the fender outward, to better cover the tire, and guide the air "around the tire." They push the fenders behind the tires inward, so as to not catch air. This is most evident in short track stock cars, where racers have the fender area just in the front of the front tires pulled as wide as the tech inspector will allow.
The final design tip for fender openings is to not make them any bigger than they need to be. Bigger gaps simply means more air can get in the fenderwell area, create drag & lift, and disturb the air flow down the side of the car.
Aerodynamic hindrances that don't decrease lift nor increase downforce ... just add drag.
• Front opening hood scoops
• Excess airflow through the grille into engine compartment
• Any objects protruding from the surfaces in the airstream: bumpers, irregular shape grilles, headlight rings, hood pins, emblems, drip rail, wing window trim, door handles, windshield wipers, mirrors, etc.
• Anything that makes the airflow boundary layer jump, step or skip: Windshield trim, vent slots in cowl, gaps in body seams, bolt on aero aids like certain spoilers, wheel flares, etc.
NACA Ducts:
When you need to pull air from the outside to inside to cool the driver, rear brakes, etc, placing a NACA duct is an option. For it to work, it must mount on a surface that has good attached boundary layer of
airflow, so the duct can scavenge this slower moving air.
Brake Ducts:
The front brakes really need cool air ducted to them. If not, you have to run larger, heavier rotors than you would otherwise need to deal with the braking heat Heavier rotors add to the rotating weight & the
larger diameter moves this rotating weight farther out on the rotational axis ... increasing the flywheel effect. This hurts performance, so you do not want to run larger or heavier brake rotors than needed.
To keep the brakes cool in Road Race & Track Cars, you'll want to duct some cool air to the rotors. I suggest a minimum of 3" diameter, smooth inner wall, fire proof ducting. In serious braking applications, race teams will run 2 or 3 ducts per side. Where you pick up the cool air is a decision to be made. Take into account this type of duct works best with low velocity air. Typically, brake duct scoops are mounted behind the grille at some point or behind fake headlights.
Putting brake ducts (or any ducts) down near the splitter, reduces the pressure on the splitter. This reduces the downforce at the splitter. So always keep ducts up & away from the airdame just above the splitter if possible.
When you mount the brake duct scoop, make sure the air is actually flowing "in" at that point. I have ran across race cars with rounded noses, where the air is only going straight into the grill in the middle
50% of the grill area ... and the bow wave was making the air go around the rest of the front end ... so their duct scoop out at the end of the grille, under the headlights, was NOT getting air coming in at all.
The air was going "across" the scoop opening.
You can always count on the center of the grille area having air coming inward, but you don't want to interfere with airflow cooling the radiator & oil coolers. I often mount brake duct scoops behind the grille,
outward from the radiator air stream, as long as I'm sure the air is coming "in" at speed and not "across". Another great place, is if you have a vertical air dam with a splitter, is attaching the duct scoop to
the airdam, above the splitter.
Lastly, I've seen racers effectively pick up air flow from mounting the scoop to the belly pan under the front of the car. I don't do this, because my cars are high travel set-ups. With the splitter or air dam grazing the track surface ... under braking & cornering ... there's not much air to cool the brakes when they really need it. But if you're not bringing the front end of the car down as far, this may be a viable
option for you.
Remember, the deck lid is where the downforce is pushing on the car, when you're utilizing a traditional spoiler at any angle above 45°. The spoiler itself is just a big wicker bill. The taller it is ... and/or the
steeper the angle ... the more downforce will be created ... along with more turbulence & drag. If you lay the spoiler down more, the spoiler itself starts to become part of the deck lid surface the airflow is
pushing down on.
Just like wings, spoilers can have wicker bills too. It is not uncommon on road race, oval track & drag cars to see wicker bills being utilized to slow the boundary layer of attached airflow down for increased downforce. I am a fan of this strategy, because it allows the main spoiler angle to be less, while maintaining the same downforce. This combination produces less drag & less turbulence behind the car.
Let's classify the two spoiler strategies as Circle Track & Drag Racing. Circle Track spoilers may be 4" to 6.5" tall, but often at 45° to 70° angles. So they act as big wicker bills to slow the air over the deck
lid, but don't add much to the effective deck lid area. Drag Racing spoilers can be 10" to 14" long and add significant surface area for downforce to be created ... due to their low to zero angle ... but don't
slow the air down much. They can & do utilize wicker bills to affect the boundary layer & slow the airflow speed.
Side plates work on spoilers just as they work on wings. Depending on design, they keep the airflow on the deck lid and/or spoiler surface & act as a rudder ... helping to hold the car in place.
For Track Cars, I am a fan of running:
• As large of a rear spoiler or wing as I can run
• At a relatively low angle
• Designed for quick & easy spoiler angle adjustment
• Well supported for zero energy loss
• With side plates as large as I can run
• And a removable wicker bill (to run different height & angles)
Roof & rear glass spill plates:
The thin strips of aluminum you often see attached to outside area of roofs & rear windows on race cars are called spill plates. They act similar to the spill plates on wings & spoilers, in that their role is to
keep the boundary layer of attached airflow in place. "In place" on the roof & back window achieves two key things. First is additional downforce in those areas. Second is the airflow is kept going the
direction needed to apply pressure & downforce on the rear deck lid & spoiler.
While we are in this area of the greenhouse, another goal is to keep the boundary layer of airflow going over the rear quarter windows ... attached ... so the air flows around the greenhouse and onto the deck
lid ... for more downforce.
Vortex Generators:
I worked directly with Gary Wheeler back in the 80's. He is the aerodynamicist that patented the Wheeler Vortex Generators & worked with Kenny Bernstein & other drag racers working on aero racing
projects. Vortex Generators are problem solvers. Vortex Generators do what they name implies ... they generate vortices (the plural of vortex). Airflow swirling in controlled vortices follows shapes better. This is important.
If the rear glass turns down at too steep of an angle, from the roof, to keep the airflow attached ... Vortex Generators placed on the roof just before the steep turn down ... creates vortices in the airflow stream ... keeping the airflow attached & following the window. Before VG's ... the airflow was separating and coming rearward at downward angle "maybe" hitting the rear of the deck lid or spoiler ... for a "little" downforce ... before it crashed into the air coming out from under the car.
Now, with VG's in place, the airflow follows the rear glass ... then the deck lid & spoiler ... creating substantially more downforce. This also directs the air off the rear of the car at a more horizontal angle,
helping it to merge with the airflow from underneath the car smoother, for less turbulence & drag.
Another key problem they solve, is the normal tumbling, turbulent airflow where it separates from the rear of a vehicle. With VG's installed, the air exits in controlled swirling vortices ... instead of
tumbling ... which reduces the drag at the rear of the vehicle ... and smoothes out the merging of airflow with air from underneath the car.
For years Gary sold his Wheeler Vortex Generators to aircraft companies to put on the underneath leading edge of aircraft wings ... to increase lift ... and increase the cargo carrying capacity of planes. He sold them to racers that used them to fix aero flow problems or increase downforce. He sold them to normal commuters who used them to increase fuel mileage. Same to the trucking industry. Today, BMW, Subaru & others use vortex generators of their own design to aid aero flow on their sporty cars.
Gary no longer makes or sells the original Wheeler Vortex Generators.
He sold the patent to some good guys that run a company called Air Tab. The design is similar & different in key ways. Today, I use the Air Tabs the same way I used the Wheeler Vortex Generators. They must be placed just in front of where you want them to work. See them here.
Air Dams / Spoilers:
A front spoiler is typically an add-on piece partially for style & partially for function. They come in a gazillion shapes & dimensions. Many known as "chin spoilers" mount at a rake angle. An air dam is typically a vertical panel either added on, or built into, the nose bodywork of the car. The shape of this vertical panel typically follows the shape the nose bodywork. In racing, extender lips are often added to the air dam that can be adjusted to just touch the track to better seal off air.
Both air dams & front spoilers are designed to reduce airflow underneath the car, to reduce lift. Air dams are more effective at sealing the car's bodywork to the track, so they are capable of almost eliminating airflow getting underneath the front of the car in the corners. Spoilers don't usually get this low, nor cover all the way across the front of the car as well. For this reason, I think of spoilers as "under car airflow reducers" & air dams as under car airflow eliminators."
A well designed front spoiler or air dam reduces the volume of air getting under the car. This creates a low pressure area & vacuum effect to help hold the front end down through the corner. Front spoilers & air dams don't create downforce in the typical sense. They do so by reducing lift & creating a low pressure vacuum area, helping to suck the front of the car down to the track.
A well designed front spoiler or air dam ... combined with a sizable splitter ... reduces lift, creates a low pressure vacuum area ... and adds downforce on the splitter ... creating more net downforce than the
spoiler or air dam would create on their own.
Splitters:
Attach at the front of the car, under the air dam or nose bodywork, and have a flat surface typically ranging from 1-5" running parallel with the ground line. Their role is to split the airflow that goes underneath the car ... from the airflow that goes up & over the hood or around the side of the fenders. Very short ones split the airflow to a degree ... and reduce lifting force ... but create very little downforce. This is a nice, solid gain in front downforce by reducing the lift. Short splitters can be
mounted without braces if well attached to the air dam or bodywork.
Longer splitters split the airflow more positively and create downforce on the front of the car. This is a big gain in front downforce, increasing front tire grip, making the car run flatter, improving turning ability,
increasing corner speeds. Because the airflow is actually putting downforce on the longer splitter, the splitter needs supports to prevent it from buckling under.
If you want your Track Car to be seriously fast, adding a quick on/off splitter you can run at the track is a big gain. Take it off to load in the trailer and just put it back on for track activity.
Rake:
Simply lowering the front of the car ... relative to the rear of the car ... helps reduce lift in two ways. First, it reduces the opening at the front of the car, reducing the volume of air that can get underneath the car to start with. Second, the larger opening in the rear of the car makes it easier for this smaller volume of air to get out.
I've seen guys drop the nose ½" in ride height in the front and increase the front tire grip a TON. Partially because it reduced lift & partially because it shifted weight balance, physically loading the front
tires more & the rear tires less.
Ground Effects Rocker Panels:
A high volume of air flows down the sides of the cars. For decades, car body styles had the doors & fenders shaped to roll under at the bottom. This contributes to air below the beltline (mid door) to rolling
under the car and adding lift. In the 80's ground effects rocker panels were added to the doors & fenders of cars like the Camaro, Trans Am & many production sporty cars. It was partly for style, but worked
functionally to prevent this airflow down the side from rolling under the body & adding lift.
I was in drag racing at that time & if you were building a serious Pro Stock car, you didn't consider a body style that didn't come with ground effects. I had a customer who had me build him the new C4
Vette body when it came out in 1984. I tried to talk him out of it for logical, performance reasons, because that car had the worst "curve under" I'd seen in modern cars & no "factory" ground effects package was offered. He loved the look & had me build it anyway. As fortune would have it, we became racing partners down the road. I had to fix that problem & many other aerodynamic flaws in that body design, to make the car drivable & competitive.
Side Splitters / Rocker Extensions:
For cars that don't have well designed ground effects on the rockers, adding side splitters or rocker extensions, is a very effective tool. A side splitter works similar to a front splitter, except they are on the side of the car. They are placed 90° to the body (or parallel with the ground, like a front splitter) and extend out anywhere from 1-3". The side splitter prevents airflow from rolling under the body. It splits the
air above it, creating a high pressure zone just above it. This reduces lift & adds net downforce, with minimal addition to drag.
Side Skirts:
Don't confuse side skirts with side splitters or rocker extensions. Side skirts are typically strips of rubber or plastic mounted vertical to the car from underneath. The purpose is similar, to prevent air from getting under the car. This is typically a street car or grass roots racer addition because the car is too high. You don't see this in most upper ends of racing, because we get the car as low as the rules allow, so there is no room, nor reason to use a rubber or plastic skirt.
Diffusers:
If designed correctly, diffusers help evacuate the airflow out from underneath the car faster, smoother & cleaner. As with everything, any time we speed up the airflow, we're reducing pressure. When the airflow is under the car ... speeding it up greatly reduces lift ... adding to the total net downforce achieved with the car.
The diffuser area increases in volume as it exits the car. This venturi effect helps suck the air from underneath the car. As the airflow exits the diffuser it is running slightly uphill ... helping to get it away from the turbulent track surface ... and easing its smooth transition with the airflow coming over the top of the body.
Proper shape of the diffuser roof is "gradual convex" so airflow will stay attached & follow. If you make the diffuser roof too tight of a radius, the airflow will detach & tumble, negating any gain. The vertical
dividers inside help channel the air. On cars where the diffuser has these on the outside, they're called vertical fences, with the goal of not allowing airflow from the side of the car's rear body to spill under &
disturb the airflow out of the diffuser.
Hood:
In most full bodied cars, especially if the car has more front weight bias, the hood is the single, most important area to achieve downforce. Fact: No full bodied race car can go faster (through the corners) than the front end has grip. To go faster, we need more front grip. Getting rear grip, especially with aero, is relatively easy compared to the front. The hood is our canvas. We want the hood to be as big, flat (or concave) & smooth. The windshield is effectively our "spoiler" that slows the air & creates a high pressure area. How much front downforce we can create will be determined by our front airdam/splitter & the hood/windshield. Let's devote serious effort to making these the best we can.
Hood Vents:
The aerodynamic goal with hood vents is to remove some of the pressure & lift under the front of the car. There are pros & cons, so there supporters & detractors. For hood vents to work well at reducing lift, the airflow needs to exit near the front of the hood. This disrupts the airflow over the hood. Does the reduction in lift offset the loss of downforce on the hood? I don't think it can be stated one way or another "for sure" without testing the effectiveness of the hood vent design & its impact on airflow across the hood.
Several auto manufacturers have made the hood vent a major & successful part of their race car design, such as the BMW Z4 GTE cars. I believe the key to their success with this design is how they blend the hood vents, hood structure & windshield angle together. That is a very successful car that no doubt took some serious wind tunnel & track time to develop.
I'm positive any of us can make a hood vent system work well & remove air pressure & lift from under the front of the car. I am concerned the project of getting the airflow to work in harmony with airflow over the hood & windshield may be outside the resources for most of us.
Side Vents / Front Fender Vents:
On the other hand ... utilizing side vents in the front fenders to remove excess air pressure from under the car ... to reduce lift ... and to extract hot air from engine compartment ... makes a lot of sense. It is much simpler, with less challenges and relatively easy to achieve success with. First, you're not disrupting airflow that provides downforce ... as the boundary layer of airflow over the hood does. Here are two examples of ducting the hot air out of the engine compartment. One minor, one extreme.
You are causing airflow detachment on the side of the fender, but if the side vent is designed almost parallel with the fender, this will be minor & the airflow can reattach itself as it flows down the side of the door. Regardless, any minor loss of side force is inconsequential compared to the significant gains in down force by reducing lift under the front end.
Tires:
Tires have a horrible aerodynamic shape & they're rotating at high speeds with disturbs the airflow even more. Having tires exposed hurts air flow. A little F1 trivia: F1 cars have pretty high coefficient of drag
numbers. Higher than most people think ... around .75+. This is because of the exposed tires, wings & other aero aids adding to the drag. But they don't run Bonneville ... so downforce makes them faster
on the twisty tracks they run.
Fender Lips:
In race series that allow, knowledgeable teams utilize short fender lips on the leading edge of the fenderwell to detach the airflow out away from the tires. These look like short, wickerbills curved to match the radius of the fenderwell. They only go on the front & slightly curve up to the top of the fenderwell opening. Some teams install these lips at 90° to the body surface, but 75-80° works better.
In the rear of the fenderwell opening, knowledgeable teams create an inner lip, that curves in from the fender. They extend in several inches with the goal of keeping airflow out of the tires inner fender area.
Some teams install these lips at 90°, but again 75-80° works better.
Fender openings:
In race series where teams can't run any fender lips, the teams often pull the front of the fender outward, to better cover the tire, and guide the air "around the tire." They push the fenders behind the tires inward, so as to not catch air. This is most evident in short track stock cars, where racers have the fender area just in the front of the front tires pulled as wide as the tech inspector will allow.
The final design tip for fender openings is to not make them any bigger than they need to be. Bigger gaps simply means more air can get in the fenderwell area, create drag & lift, and disturb the air flow down the side of the car.
Aerodynamic hindrances that don't decrease lift nor increase downforce ... just add drag.
• Front opening hood scoops
• Excess airflow through the grille into engine compartment
• Any objects protruding from the surfaces in the airstream: bumpers, irregular shape grilles, headlight rings, hood pins, emblems, drip rail, wing window trim, door handles, windshield wipers, mirrors, etc.
• Anything that makes the airflow boundary layer jump, step or skip: Windshield trim, vent slots in cowl, gaps in body seams, bolt on aero aids like certain spoilers, wheel flares, etc.
NACA Ducts:
When you need to pull air from the outside to inside to cool the driver, rear brakes, etc, placing a NACA duct is an option. For it to work, it must mount on a surface that has good attached boundary layer of
airflow, so the duct can scavenge this slower moving air.
Brake Ducts:
The front brakes really need cool air ducted to them. If not, you have to run larger, heavier rotors than you would otherwise need to deal with the braking heat Heavier rotors add to the rotating weight & the
larger diameter moves this rotating weight farther out on the rotational axis ... increasing the flywheel effect. This hurts performance, so you do not want to run larger or heavier brake rotors than needed.
To keep the brakes cool in Road Race & Track Cars, you'll want to duct some cool air to the rotors. I suggest a minimum of 3" diameter, smooth inner wall, fire proof ducting. In serious braking applications, race teams will run 2 or 3 ducts per side. Where you pick up the cool air is a decision to be made. Take into account this type of duct works best with low velocity air. Typically, brake duct scoops are mounted behind the grille at some point or behind fake headlights.
Putting brake ducts (or any ducts) down near the splitter, reduces the pressure on the splitter. This reduces the downforce at the splitter. So always keep ducts up & away from the airdame just above the splitter if possible.
When you mount the brake duct scoop, make sure the air is actually flowing "in" at that point. I have ran across race cars with rounded noses, where the air is only going straight into the grill in the middle
50% of the grill area ... and the bow wave was making the air go around the rest of the front end ... so their duct scoop out at the end of the grille, under the headlights, was NOT getting air coming in at all.
The air was going "across" the scoop opening.
You can always count on the center of the grille area having air coming inward, but you don't want to interfere with airflow cooling the radiator & oil coolers. I often mount brake duct scoops behind the grille,
outward from the radiator air stream, as long as I'm sure the air is coming "in" at speed and not "across". Another great place, is if you have a vertical air dam with a splitter, is attaching the duct scoop to
the airdam, above the splitter.
Lastly, I've seen racers effectively pick up air flow from mounting the scoop to the belly pan under the front of the car. I don't do this, because my cars are high travel set-ups. With the splitter or air dam grazing the track surface ... under braking & cornering ... there's not much air to cool the brakes when they really need it. But if you're not bringing the front end of the car down as far, this may be a viable
option for you.
#38
Designing & Tuning Aerodynamics for Track & Racing / Re: Designing & Tuning Aerodyn...
Last post by Ron Sutton - Apr 15, 2026, 01:18 PMBody shapes for decreased drag & increased downforce:
Nose/Front End:
• As small of total nose surface area as possible.
• Steeply raked back to the top, with the lower valance, spoiler or air dam out as far forward as possible.
• Nice, smooth, round transitions to the hood.
• Mount the valance, spoiler or air dam as low to the track surface as possible.
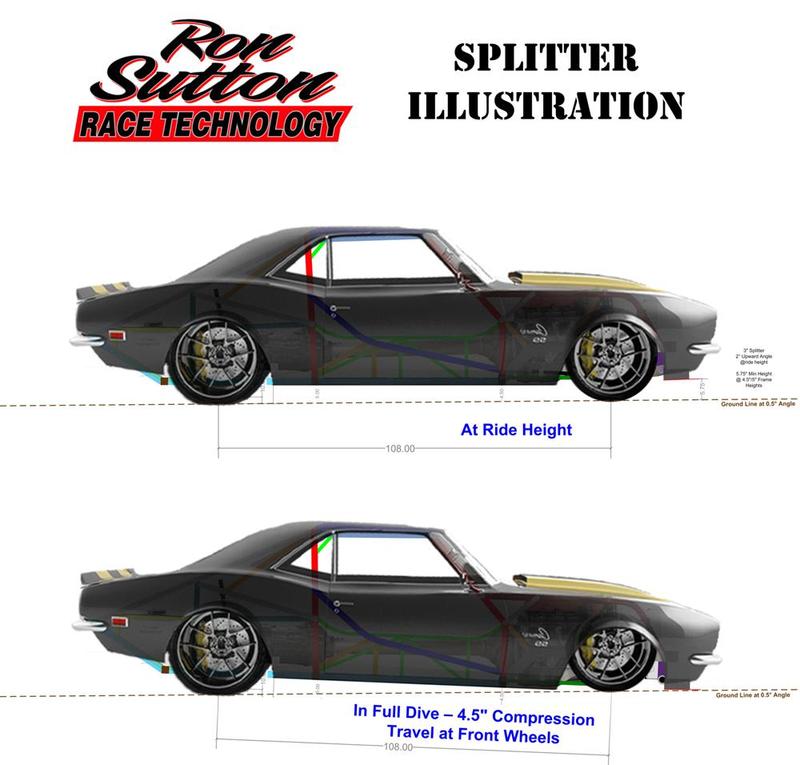
• Get the splitter or spoiler strip "just skimming" or "almost touching" the track surface in full dive.
More on the Nose:
• All components as flush as possible with the surface of the nose
(grille, headlights, trim, spoiler, etc)
• Shape the nose either more rounded, or pointed, in the center ... versus flat ... so the air splits.
• Smooth radius around sides where it blends into fenders.
• Smooth radius around top where it blends into hood.
To make your splitter work optimum, you want it right on the track surface in the corners where you have the most front suspension compression. Some grassroots racers estimate this by knowing their suspension travel first, then sneak up on it with wear strips. Others test on track with a GoPro camera and lower it until it's almost scraping ... or is scraping.
Hood/Cowl:
• Hood surface flat & smooth as possible.
• Hood surface lower than fenders or concave in shape.
• If shaped properly, more surface area creates more front downforce.
• Anything protruding through hood detaches airflow at that point.
• A tall front opening hood scoop, even of the perfect shape, adds drag & disrupts airflow.
• If a hood scoop is needed, the cowl induction style is best for aero.
• Eliminate, cover, or smooth vents in cowl.
• Remove windshield wiper arms
• Eliminate, cover, or smooth wiper arm holes in cowl.
Greenhouse:
• As small of total surface area as possible (lower chopped roof).
• Steeply raked windshield.
• Smooth transition from hood/cowl to windshield.
• Flush mount windshield to a-pillars & roof (no trim).
• Smooth, gentle radius of A-pillars.
• Remove rain drip rail & smooth.
• Flush mount door & rear quarter glass to A, B & C pillars.
• Gently sloping rear window, like a "fastback" car model, as opposed to a "notchback."
• Smooth radius at transition from roof to rear glass.
• Flush mount rear glass to c-pillars & roof (no trim).
• Roof flat or concave when viewed from front or rear.
• Roof flat with smooth radius rear of roof where it blends into rear glass (from side view)
• Spill plates ran along both sides of roof & back glass to keep boundary layer from spilling over sides.
If you run on track with no windows, or the windows down:
• Airflow in the cockpit is drag ... with no gain.
• The B-pillars need large, smooth gentle radius from cockpit to body.
• Keep the B-pillars angle to the body less than 90° at its steepest angle. 40° - 60° would be good.
• You can even use a wicker bill sort of vertical trim to keep airflow out of the cockpit.
Rear Body:
• Smooth transition from back glass to deck lid.
• Deck lid surface flat & smooth as possible.
• Deck lid surface lower than fenders or concave shape.
• If shaped properly, more surface area creates more rear downforce.
• Longer deck lid creates more downforce, but more importantly redirects exiting airflow more parallel to ground.
• Fenders curving in from rear axle centerline back, so air can converge together easier.*
• Trailing edges "sharp" 90° angles to bumper & tail light panel ... for clean flow detachment & less tumble.
* This is not the route to create side force. To create side force, you want the rear fenders to be as flat as billboards, and act like the side boards of a sprint car wing. If rules permit, a small wickerbill
running vertical at the trailing edge of the rear quarter fenders provides cleaner flow detachment & less tumble.
As long as you're buying or making a wing of proven design & shape ... surface area is the key to how much down force it is capable of. Simply more surface area is more downforce capability. Wings can be mounted on the front or rear of Road Race & Track Cars. How close, or how far way, you mount the wing to the body surface will play a role in both the wing's effectiveness & airflow over the body. If you place the wing higher, away from the car's body, in clean air ... it will be more effective at producing downforce because it's out of the car's turbulent airflow. But this does not help the airflow over the car body. As mentioned earlier, if you place the wing closer to the body, the airflow under the wing, can help you direct the airflow over that part of the body.
Wing angle, also known as attack angle, affects the wing's actual downforce being created. More downward angle in the front equals more downforce ... up to the point of "stall". When you angle the wing downward too far ... you reach airflow stall speed ... and downforce actually reduces. Drag continues to increase with excessive wing angle, but downforce starts decreasing. For most wing designs this is somewhere around 22° of downward front wing angle.
Side plates:
If we were primarily driving straight, side plates on wings would less needed. Their primary role is to keep airflow on the wing surface, as opposed to spilling off the sides. They do make the wing somewhat
more effective in a straight line. But in the corners, is where they really earn their keep. They help airflow stay on the wing surface ... while the car is in a state of yaw turning ... and the airflow isn't parallel with the wing. Plus they act as a rudder ... helping to hold the car in place.
In sprint cars, the side plates are massive, and called "side boards" by the racers. As mentioned above, veteran sprint car racers will tell you the "side boards" are more important than the wing surface to
cornering speed. Realize side plates ... and especially massive side boards ... do add drag ... as will any surface you add that is exposed to the airflow stream.
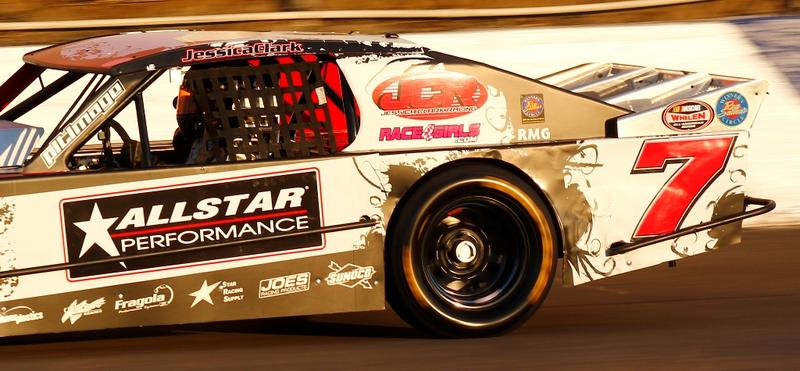
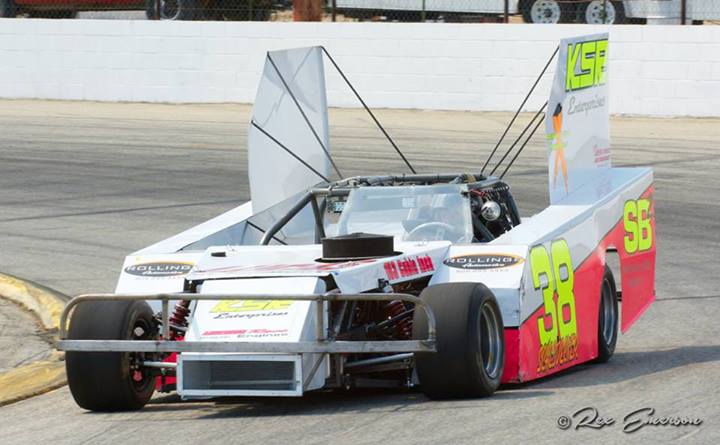
Experienced racers know side force is just as valuabe as downforce. The car below may look ridiculous, but it set oval track records whenever it runs. Let's borrow ftrom this in smaller ways.
Wicker Bills or Gurney Flap:
Back in the day, Dan Gurney added a strip of aluminum at the top trailing edge of his Indy Car wing for more downforce. As discussed earlier, this slows the air speed across the top of the wing surface,
creating a higher pressure area & more downforce. The concept of wicker bills already existed in aircraft, but since Dan Gurney did it in the early days of Indy car racing, open wheel racers called it a Gurney Flap.
The height & angle of the wicker bill all play a role in its effects:
• Taller and/or steeper angles close to 90° ... create more downforce ... and more drag & turbulence behind the wing.
• Shorter and/or laid back angles less than 90° ... create less downforce ... and less drag & turbulence behind the wing.
A short wicker bill with a 50°-75° angle lip can be a good tool in a lot of places where you need the airflow to create more force in front of it ... and detach cleanly behind it.
Aero Wing Struts:
When building struts to install your wing(s), about the only shape worse than round would be square tubing. Anywhere you have round tubing exposed to airflow ... you are adding unnecessary drag. If you
design your wing struts with aerodynamic tear drop tubing (aka Streamline Tubing ) the drag in that area will be less than half of what round tubing produces.
Nose/Front End:
• As small of total nose surface area as possible.
• Steeply raked back to the top, with the lower valance, spoiler or air dam out as far forward as possible.
• Nice, smooth, round transitions to the hood.
• Mount the valance, spoiler or air dam as low to the track surface as possible.
• Get the splitter or spoiler strip "just skimming" or "almost touching" the track surface in full dive.
More on the Nose:
• All components as flush as possible with the surface of the nose
(grille, headlights, trim, spoiler, etc)
• Shape the nose either more rounded, or pointed, in the center ... versus flat ... so the air splits.
• Smooth radius around sides where it blends into fenders.
• Smooth radius around top where it blends into hood.
To make your splitter work optimum, you want it right on the track surface in the corners where you have the most front suspension compression. Some grassroots racers estimate this by knowing their suspension travel first, then sneak up on it with wear strips. Others test on track with a GoPro camera and lower it until it's almost scraping ... or is scraping.
Hood/Cowl:
• Hood surface flat & smooth as possible.
• Hood surface lower than fenders or concave in shape.
• If shaped properly, more surface area creates more front downforce.
• Anything protruding through hood detaches airflow at that point.
• A tall front opening hood scoop, even of the perfect shape, adds drag & disrupts airflow.
• If a hood scoop is needed, the cowl induction style is best for aero.
• Eliminate, cover, or smooth vents in cowl.
• Remove windshield wiper arms
• Eliminate, cover, or smooth wiper arm holes in cowl.
Greenhouse:
• As small of total surface area as possible (lower chopped roof).
• Steeply raked windshield.
• Smooth transition from hood/cowl to windshield.
• Flush mount windshield to a-pillars & roof (no trim).
• Smooth, gentle radius of A-pillars.
• Remove rain drip rail & smooth.
• Flush mount door & rear quarter glass to A, B & C pillars.
• Gently sloping rear window, like a "fastback" car model, as opposed to a "notchback."
• Smooth radius at transition from roof to rear glass.
• Flush mount rear glass to c-pillars & roof (no trim).
• Roof flat or concave when viewed from front or rear.
• Roof flat with smooth radius rear of roof where it blends into rear glass (from side view)
• Spill plates ran along both sides of roof & back glass to keep boundary layer from spilling over sides.
If you run on track with no windows, or the windows down:
• Airflow in the cockpit is drag ... with no gain.
• The B-pillars need large, smooth gentle radius from cockpit to body.
• Keep the B-pillars angle to the body less than 90° at its steepest angle. 40° - 60° would be good.
• You can even use a wicker bill sort of vertical trim to keep airflow out of the cockpit.
Rear Body:
• Smooth transition from back glass to deck lid.
• Deck lid surface flat & smooth as possible.
• Deck lid surface lower than fenders or concave shape.
• If shaped properly, more surface area creates more rear downforce.
• Longer deck lid creates more downforce, but more importantly redirects exiting airflow more parallel to ground.
• Fenders curving in from rear axle centerline back, so air can converge together easier.*
• Trailing edges "sharp" 90° angles to bumper & tail light panel ... for clean flow detachment & less tumble.
* This is not the route to create side force. To create side force, you want the rear fenders to be as flat as billboards, and act like the side boards of a sprint car wing. If rules permit, a small wickerbill
running vertical at the trailing edge of the rear quarter fenders provides cleaner flow detachment & less tumble.
As long as you're buying or making a wing of proven design & shape ... surface area is the key to how much down force it is capable of. Simply more surface area is more downforce capability. Wings can be mounted on the front or rear of Road Race & Track Cars. How close, or how far way, you mount the wing to the body surface will play a role in both the wing's effectiveness & airflow over the body. If you place the wing higher, away from the car's body, in clean air ... it will be more effective at producing downforce because it's out of the car's turbulent airflow. But this does not help the airflow over the car body. As mentioned earlier, if you place the wing closer to the body, the airflow under the wing, can help you direct the airflow over that part of the body.
Wing angle, also known as attack angle, affects the wing's actual downforce being created. More downward angle in the front equals more downforce ... up to the point of "stall". When you angle the wing downward too far ... you reach airflow stall speed ... and downforce actually reduces. Drag continues to increase with excessive wing angle, but downforce starts decreasing. For most wing designs this is somewhere around 22° of downward front wing angle.
Side plates:
If we were primarily driving straight, side plates on wings would less needed. Their primary role is to keep airflow on the wing surface, as opposed to spilling off the sides. They do make the wing somewhat
more effective in a straight line. But in the corners, is where they really earn their keep. They help airflow stay on the wing surface ... while the car is in a state of yaw turning ... and the airflow isn't parallel with the wing. Plus they act as a rudder ... helping to hold the car in place.
In sprint cars, the side plates are massive, and called "side boards" by the racers. As mentioned above, veteran sprint car racers will tell you the "side boards" are more important than the wing surface to
cornering speed. Realize side plates ... and especially massive side boards ... do add drag ... as will any surface you add that is exposed to the airflow stream.
Experienced racers know side force is just as valuabe as downforce. The car below may look ridiculous, but it set oval track records whenever it runs. Let's borrow ftrom this in smaller ways.
Wicker Bills or Gurney Flap:
Back in the day, Dan Gurney added a strip of aluminum at the top trailing edge of his Indy Car wing for more downforce. As discussed earlier, this slows the air speed across the top of the wing surface,
creating a higher pressure area & more downforce. The concept of wicker bills already existed in aircraft, but since Dan Gurney did it in the early days of Indy car racing, open wheel racers called it a Gurney Flap.
The height & angle of the wicker bill all play a role in its effects:
• Taller and/or steeper angles close to 90° ... create more downforce ... and more drag & turbulence behind the wing.
• Shorter and/or laid back angles less than 90° ... create less downforce ... and less drag & turbulence behind the wing.
A short wicker bill with a 50°-75° angle lip can be a good tool in a lot of places where you need the airflow to create more force in front of it ... and detach cleanly behind it.
Aero Wing Struts:
When building struts to install your wing(s), about the only shape worse than round would be square tubing. Anywhere you have round tubing exposed to airflow ... you are adding unnecessary drag. If you
design your wing struts with aerodynamic tear drop tubing (aka Streamline Tubing ) the drag in that area will be less than half of what round tubing produces.
#39
Designing & Tuning Aerodynamics for Track & Racing / Re: Designing & Tuning Aerodyn...
Last post by Ron Sutton - Apr 15, 2026, 12:45 PMKey concepts:
Bernoulli's Principle is often referred to in aerodynamics conversations. It states that as the speed of a moving fluid increases, the pressure within the fluid decreases. This includes gases & air. Slower air flow, if attached to the surface, creates more force. Faster air flow creates less force. Digest that a bit.
A quick primer about how air speed differential creates downforce or lift:
If the air under the car is flowing slowly ... it creates more force ... which is lift. If the air over the body is flowing fast ... it creates less force ... which would be downforce. So this combination creates little
downforce & high amounts of lift. Not good.
For increased downforce, we want to speed up the air under the car ... to decrease lift ... and slow down the air over the body ... to increase down force. Make sense?
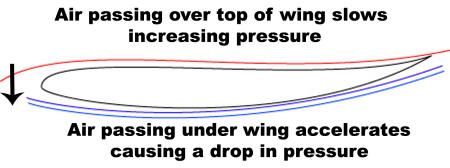
This illustration is of a race car wing, which is upside down from an airplane wing. The concave design of the top side of this race car wing slows the airflow, which creates pressure. Pressure is force. The convex design of the bottom of this race car wing speeds up the airflow which reduces pressure. This air speed differential creates force pushing down ... what we call creating downforce. That is how wings work.
On car bodies, severe angles ... like the front nose & grill area, windshield & rear spoiler ... slow air flow ... building pressure & downforce. Flat or slightly curved, smooth, continuous surfaces ... parallel to the airflow ... with little or no objects intruding into the airflow stream ... help the air flow faster.
While we can have somewhat of an effect of the air going over the body of the car, we can have a greater effect on what happens under the car. The easiest & smartest strategy is to prevent air from getting underneath in the first place. You can't prevent it all ... but you can reduce it a ton. And this creates a low pressure area, reducing lift and creating more net downforce. Downforce is grip ... and grip is speed. You still have some airflow under the car. The better you manage & direct it ... and smooth its path to speed it up ... getting the air out from underneath quickly, smoothly & cleanly ... increases this downforce effect.
How do we speed up the air under the car?
• Reduce the volume of air going under the car at the sources (front & sides)
• Create smooth, flat surfaces
• Eliminate or cover objects that will disturb flow
• Help the air get out from under the car at the rear
Top side airflow crashing into underbody airflow:
In "most" standard production car body designs ... especially older models ... the airflow coming over the roof & off the decklid is at a angle to the ground. This mass of airflow comes off the rear of the car
at a 40° to 60° angle ... to the more or less horizontal airflow coming out from underneath the car. Where these two airflow streams "crash" into each other ... an airflow boiling effect is created which is very turbulent.
This is very bad in many ways:
1. This is the opposite of flowing together smoothly & cleanly like a tear drop.
2. This extreme turbulence creates extreme drag on the rear of the car.
3. This turbulence slows the airflow underneath the car trying to get out ... so lift increases.
The steeper the angle of airflow off the deck lid, the worse the problem. We need to address this problem from the top side & bottom side to redirect the airflow to come together more smoothly, cleanly
with less turbulence. This requires a much gentler angle of airflow to meet & merge back together smoothly, like the trailing edge of an airplane wing or a rain drop.
For the underneath, a diffuser ... if designed effectively & fed the underbody airflow correctly ... will help the airflow come out in a cleaner stream with less turbulence. A flat bottom belly pan is not required for an effect, but helps the process and can increase the effect up to five-fold.
For the top side, we need to redirect the air off the body so it is closer to horizontal, or said another way, at less of an attack angle. This is where the roof, rear glass, deck lid & spoiler (or wing) all come into play. This may surprise you, but the deck lid is the key. Assuming we're getting good attached airflow over the deck lid ... the longer the deck lid is ... the more it will straighten out the airflow closer to
horizontal. This is key.
But for this to work, we need attached airflow over the deck lid. The roof shaped with a smooth gentle convex curve to the back glass ... with no steps, dips or bumps ... and the back glass at a gentle convex
radius & angle (like a fast back) to the deck lid ... also with no steps, dips or bumps ... are key to keeping the airflow attached. Race car designers spend more time here than you can imagine.
As long as attached airflow is going over a medium to long deck lid ... we have redirected the airflow closer to horizontal ... which will help the airflow to come together more smoothly, cleanly with less
turbulence at the rear of the car. This produces less drag & more downforce. Short deck lid cars are harder to achieve this with. Pro Stock drag racers have the right idea with the rear spoilers. They run
them horizontal, or even a few degrees down at the trailing edge. Basically, they're just making the deck lid longer ... so it positively directs the airflow off the rear of the car ... close to horizontal.
These same Pro Stock racers use a short wicker bill (also known as a Gurney flap) on the trailing edge of the spoiler. This helps slow the boundary layer down for increased pressure & downforce ... and helps the airflow make a clean detachment ... which is key for the upper & lower airflow to merge smoothly.
For cars running wings in the rear, proximity to the body is key. Yes, the wing will have cleaner air up high, away from the deck lid. But then it's not helping the airflow straighten out off the body. When a rear wing is mounted to the deck lid ... at the correct height ... the air flowing over the top of the wing surface is making downforce. While the air flowing underneath the wing is helping to direct the airflow off the deck lid at a more horizontal angle. This height varies with body shape. Also, when using a wing, the deck lid needs a sharp edge, or hard corner, at the trailing edge for the airflow to make a clean detachment.
Spoilers with serious angle ... say 45° to 70° like used in stock car racing ... are a compromise. In stock car racing, often the rules require the spoilers be at a certain minimum angle. For many short track
series, that angle is 55° and 70° for others. This is done with the "intent" of keeping the playing field level. LOL
This is a critical concept to embrace. This will be new to some of you & old hat for others with more aero knowledge. The downforce is NOT on the rear spoiler. The downforce is created on the rear deck lid. The spoiler just acts as a big wicker bill to slow the airflow down ... which increases the air pressure & downforce on the deck lid.
Spoilers that are taller or angled more upright, slow the air more, which is what increases the air pressure & downforce on the deck lid. But with this ... you're increasing drag ... a ton ... because the spoiler makes the exiting airflow tumble violently. You're achieving two good effects & two bad effects at the same time.
The two good effects:
• Adding downforce to the rear of the car
• Straightening the airflow off the deck
The two bad effects:
• The airflow coming off the tall, severely angled spoiler is tumbling violently & very turbulent.
• This enlarges the vacuum effect at the rear of the car ... increasing drag exponentially.
You gain downforce & reduce lift ... but the drag goes up a lot! This is why drafting works on high speed tracks. There is a vacuum at the rear of these stock cars sucking them back. If another car can get its nose up in there, the two cars "suck together" and share one frontal area & one rear vacuum drag for the two cars.
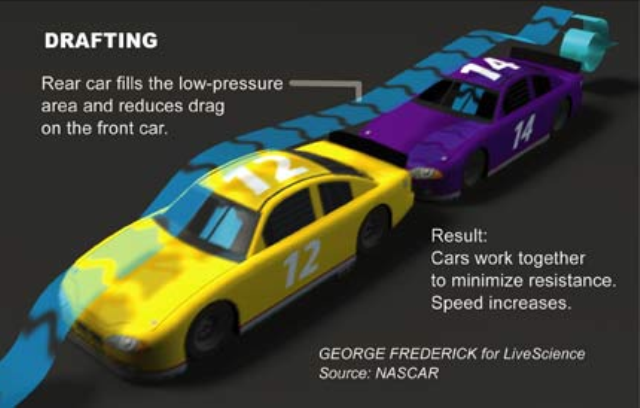
Spoilers vs Wings:
It's important to clarify that wings create drag along with downforce too. How deep the top concave profile of the wing determines that downforce & drag equation. Having said that ... wings are TYPICALLY more efficient that spoilers. I say typically, because I am sure there are exceptions. And of course size matters. We can't compare the downforce & drag of a 1" spoiler versus a 14" wing. Or vice versa. But in general, wings are going to have a much better downforce to drag ratio than spoilers.
Energy Loss:
While we're on spoilers & wings, the discussion of energy loss needs to be broached. The actual net force that occurs ... whether it is downforce, side force or lift ... can be affected by energy loss through the
structure. I learned about this in my drag race days of the 1980's. One night in the race shop, while the guys & I were having an adult beverage, we happened upon an important aerodynamic concept. This was back in the day that Pro Stock cars ran fixed angle spoilers at 15° to 25°. One of the fat crew guys leaned on the lightweight fiberglass deck lid ... it flexed in ... but the rear of this softly sprung car ... nor the rear tires with 4.5 psi in them ... didn't really squat any.
Hmmmm. One of the guys wondered if we're really getting all the downforce that we think we're getting to the rear tires. We played around & decided to do some R&D. We reinforced the deck lid structure. We built a new spoiler that hinged at the leading edge where it connected to the deck lid. We reinforced
the 12" long spoiler itself. We made an adjustable support on the rear of the car to allow for quick & easy spoiler angle changes. We built a light, but strong, chromoly tubing structure in the rear of the chassis
that provided solid support for the adjustable struts off the spoiler trailing edge, pivot point of the spoiler's leading edge and the deck lid.
In the shop, now when we pushed on the deck lid or spoiler, it pushed down on the chassis & tires. So, we went track testing. We started with the spoiler at the same angle as before, which was 17°. Our testing got side tracked because we were having engine problems on the top end. The driver said the engine was bogging down in top gear. We went through all the normal checks, fuel pressure, spark, EGT, etc. No problems.
One guy ... a not very sharp guy ... said, "do you think we might have added downforce and drag ... and it's making the engine bog?" No. Of course not. It's a mountain motor making obscene power. Hmmm.
Well, let's try it. We lowered the rear spoiler angle to 13° ... and the engine ran better. The ET got quicker & the mph went up. Hmmm. We lowered it to 10° ... and it ran quicker & faster. We lowered it to 7° ... quicker & faster. We went to 5° ... then 3°, 2° & 1° ... all quicker & faster. I asked the driver how the stability was & he said it was great, better than ever. At the end of the day, the car was running quicker & faster than we ever had.
The lesson here is ... that I have since experienced a zillion times over the next 25 years of racing ... you are wasting force energy ... be it down force or side force ... if the pressure on the panel gets lost
through flex in the body or body structure. And apparently, our "not so sharp" guy was right.
Think of it this way: If you're pushing on a panel with 80# ... and that panel and/or the supports flex ... that flex is eating up some or all of that 80#. It's like electricity running through wire that is too small of
a diameter for its length. You're not getting the same net result at the other end. Another analogy is chassis flex. If you send 800hp through the car, but the chassis & body flex a lot, that flex is eating up a bunch of your power.
Airflow over different shapes:
When designing a car to be more aerodynamic, it's important to know how air flows over different shapes, so you know what shape to use where. Remember the rain drop or tear drop shape is the most
aerodynamic. An airplane wing is simply an elongated tear drop shape ... to provide surface area for lift. Or in case of race cars, where it's flipped over ... surface area for down force.
Round is a great leading edge shape, but a horrible trailing edge shape. A piece of round tubing in the airflow stream has a lot of drag. For this reason race car designers of dragsters, Indy cars, GT
cars, etc, use aerodynamic tear drop tubing (aka Streamline Tubing) on struts or suspension pieces exposed to airflow.
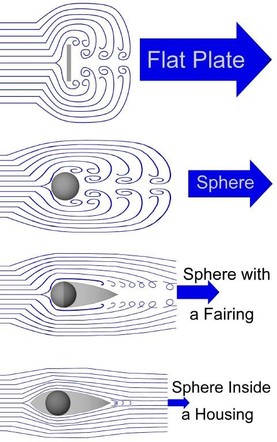
Concave surfaces, slow the airflow speed, creating more air pressure & force. Convex surfaces increase the airflow speed, creating less air pressure ... even a pressure drop ... and therefore less force. Again, think how an airplane wing is designed. Smooth, flat surfaces are "ok" at creating force. They are less effective than concave & more effective than convex.
Speaking of concave. When you look at roof of cars with two "bubbles" where the passengers heads are ... what's in the middle? A concave area to create downforce. These car designers could have just
as easily made the roof flat or domed (convex) ... but that wouldn't optimize the airflow for downforce. Another example is with Trans Am cars & stock cars that are wider at the front & rear fender wells ... and narrower at the doors. This concave area creates side force, helping the car carry more cornering speed.
Airflow will follow convex shapes ... like a roof or fast back style back glass ... as long as the radius isn't too sharp. This is key in designing or deciding on windshield shape, roof shape & rear window
shape when designing & building a car from scratch. Or, important to understand if you're choosing a car body with the right shapes already on it. I love the 80's G-body style cars & had a Hurst/Olds style Cutlass drag car in the mid-80's. But I wouldn't choose that sharp notchback style for optimum aerodynamics with what I know today.
The decision to make body corners with sharp, hard 90° edges ... or gentle corners with a large radius ... depends on your goal. Where you want the airflow to stay attached ... for side force or downforce ... you want to use gentle corners with a large radius. This is what you want on the sides of the car's nose blending into the side fenders. Where you want the airflow to become quickly detached ... to break away cleanly ... you want to use sharp, hard 90° edges or even short wicker bills. You're starting to see sharp edges at the rear of production cars. That is to get the airflow to break away from the body & reduce drag ... increasing fuel mileage.
Bernoulli's Principle is often referred to in aerodynamics conversations. It states that as the speed of a moving fluid increases, the pressure within the fluid decreases. This includes gases & air. Slower air flow, if attached to the surface, creates more force. Faster air flow creates less force. Digest that a bit.
A quick primer about how air speed differential creates downforce or lift:
If the air under the car is flowing slowly ... it creates more force ... which is lift. If the air over the body is flowing fast ... it creates less force ... which would be downforce. So this combination creates little
downforce & high amounts of lift. Not good.
For increased downforce, we want to speed up the air under the car ... to decrease lift ... and slow down the air over the body ... to increase down force. Make sense?
This illustration is of a race car wing, which is upside down from an airplane wing. The concave design of the top side of this race car wing slows the airflow, which creates pressure. Pressure is force. The convex design of the bottom of this race car wing speeds up the airflow which reduces pressure. This air speed differential creates force pushing down ... what we call creating downforce. That is how wings work.
On car bodies, severe angles ... like the front nose & grill area, windshield & rear spoiler ... slow air flow ... building pressure & downforce. Flat or slightly curved, smooth, continuous surfaces ... parallel to the airflow ... with little or no objects intruding into the airflow stream ... help the air flow faster.
While we can have somewhat of an effect of the air going over the body of the car, we can have a greater effect on what happens under the car. The easiest & smartest strategy is to prevent air from getting underneath in the first place. You can't prevent it all ... but you can reduce it a ton. And this creates a low pressure area, reducing lift and creating more net downforce. Downforce is grip ... and grip is speed. You still have some airflow under the car. The better you manage & direct it ... and smooth its path to speed it up ... getting the air out from underneath quickly, smoothly & cleanly ... increases this downforce effect.
How do we speed up the air under the car?
• Reduce the volume of air going under the car at the sources (front & sides)
• Create smooth, flat surfaces
• Eliminate or cover objects that will disturb flow
• Help the air get out from under the car at the rear
Top side airflow crashing into underbody airflow:
In "most" standard production car body designs ... especially older models ... the airflow coming over the roof & off the decklid is at a angle to the ground. This mass of airflow comes off the rear of the car
at a 40° to 60° angle ... to the more or less horizontal airflow coming out from underneath the car. Where these two airflow streams "crash" into each other ... an airflow boiling effect is created which is very turbulent.
This is very bad in many ways:
1. This is the opposite of flowing together smoothly & cleanly like a tear drop.
2. This extreme turbulence creates extreme drag on the rear of the car.
3. This turbulence slows the airflow underneath the car trying to get out ... so lift increases.
The steeper the angle of airflow off the deck lid, the worse the problem. We need to address this problem from the top side & bottom side to redirect the airflow to come together more smoothly, cleanly
with less turbulence. This requires a much gentler angle of airflow to meet & merge back together smoothly, like the trailing edge of an airplane wing or a rain drop.
For the underneath, a diffuser ... if designed effectively & fed the underbody airflow correctly ... will help the airflow come out in a cleaner stream with less turbulence. A flat bottom belly pan is not required for an effect, but helps the process and can increase the effect up to five-fold.
For the top side, we need to redirect the air off the body so it is closer to horizontal, or said another way, at less of an attack angle. This is where the roof, rear glass, deck lid & spoiler (or wing) all come into play. This may surprise you, but the deck lid is the key. Assuming we're getting good attached airflow over the deck lid ... the longer the deck lid is ... the more it will straighten out the airflow closer to
horizontal. This is key.
But for this to work, we need attached airflow over the deck lid. The roof shaped with a smooth gentle convex curve to the back glass ... with no steps, dips or bumps ... and the back glass at a gentle convex
radius & angle (like a fast back) to the deck lid ... also with no steps, dips or bumps ... are key to keeping the airflow attached. Race car designers spend more time here than you can imagine.
As long as attached airflow is going over a medium to long deck lid ... we have redirected the airflow closer to horizontal ... which will help the airflow to come together more smoothly, cleanly with less
turbulence at the rear of the car. This produces less drag & more downforce. Short deck lid cars are harder to achieve this with. Pro Stock drag racers have the right idea with the rear spoilers. They run
them horizontal, or even a few degrees down at the trailing edge. Basically, they're just making the deck lid longer ... so it positively directs the airflow off the rear of the car ... close to horizontal.
These same Pro Stock racers use a short wicker bill (also known as a Gurney flap) on the trailing edge of the spoiler. This helps slow the boundary layer down for increased pressure & downforce ... and helps the airflow make a clean detachment ... which is key for the upper & lower airflow to merge smoothly.
For cars running wings in the rear, proximity to the body is key. Yes, the wing will have cleaner air up high, away from the deck lid. But then it's not helping the airflow straighten out off the body. When a rear wing is mounted to the deck lid ... at the correct height ... the air flowing over the top of the wing surface is making downforce. While the air flowing underneath the wing is helping to direct the airflow off the deck lid at a more horizontal angle. This height varies with body shape. Also, when using a wing, the deck lid needs a sharp edge, or hard corner, at the trailing edge for the airflow to make a clean detachment.
Spoilers with serious angle ... say 45° to 70° like used in stock car racing ... are a compromise. In stock car racing, often the rules require the spoilers be at a certain minimum angle. For many short track
series, that angle is 55° and 70° for others. This is done with the "intent" of keeping the playing field level. LOL
This is a critical concept to embrace. This will be new to some of you & old hat for others with more aero knowledge. The downforce is NOT on the rear spoiler. The downforce is created on the rear deck lid. The spoiler just acts as a big wicker bill to slow the airflow down ... which increases the air pressure & downforce on the deck lid.
Spoilers that are taller or angled more upright, slow the air more, which is what increases the air pressure & downforce on the deck lid. But with this ... you're increasing drag ... a ton ... because the spoiler makes the exiting airflow tumble violently. You're achieving two good effects & two bad effects at the same time.
The two good effects:
• Adding downforce to the rear of the car
• Straightening the airflow off the deck
The two bad effects:
• The airflow coming off the tall, severely angled spoiler is tumbling violently & very turbulent.
• This enlarges the vacuum effect at the rear of the car ... increasing drag exponentially.
You gain downforce & reduce lift ... but the drag goes up a lot! This is why drafting works on high speed tracks. There is a vacuum at the rear of these stock cars sucking them back. If another car can get its nose up in there, the two cars "suck together" and share one frontal area & one rear vacuum drag for the two cars.
Spoilers vs Wings:
It's important to clarify that wings create drag along with downforce too. How deep the top concave profile of the wing determines that downforce & drag equation. Having said that ... wings are TYPICALLY more efficient that spoilers. I say typically, because I am sure there are exceptions. And of course size matters. We can't compare the downforce & drag of a 1" spoiler versus a 14" wing. Or vice versa. But in general, wings are going to have a much better downforce to drag ratio than spoilers.
Energy Loss:
While we're on spoilers & wings, the discussion of energy loss needs to be broached. The actual net force that occurs ... whether it is downforce, side force or lift ... can be affected by energy loss through the
structure. I learned about this in my drag race days of the 1980's. One night in the race shop, while the guys & I were having an adult beverage, we happened upon an important aerodynamic concept. This was back in the day that Pro Stock cars ran fixed angle spoilers at 15° to 25°. One of the fat crew guys leaned on the lightweight fiberglass deck lid ... it flexed in ... but the rear of this softly sprung car ... nor the rear tires with 4.5 psi in them ... didn't really squat any.
Hmmmm. One of the guys wondered if we're really getting all the downforce that we think we're getting to the rear tires. We played around & decided to do some R&D. We reinforced the deck lid structure. We built a new spoiler that hinged at the leading edge where it connected to the deck lid. We reinforced
the 12" long spoiler itself. We made an adjustable support on the rear of the car to allow for quick & easy spoiler angle changes. We built a light, but strong, chromoly tubing structure in the rear of the chassis
that provided solid support for the adjustable struts off the spoiler trailing edge, pivot point of the spoiler's leading edge and the deck lid.
In the shop, now when we pushed on the deck lid or spoiler, it pushed down on the chassis & tires. So, we went track testing. We started with the spoiler at the same angle as before, which was 17°. Our testing got side tracked because we were having engine problems on the top end. The driver said the engine was bogging down in top gear. We went through all the normal checks, fuel pressure, spark, EGT, etc. No problems.
One guy ... a not very sharp guy ... said, "do you think we might have added downforce and drag ... and it's making the engine bog?" No. Of course not. It's a mountain motor making obscene power. Hmmm.
Well, let's try it. We lowered the rear spoiler angle to 13° ... and the engine ran better. The ET got quicker & the mph went up. Hmmm. We lowered it to 10° ... and it ran quicker & faster. We lowered it to 7° ... quicker & faster. We went to 5° ... then 3°, 2° & 1° ... all quicker & faster. I asked the driver how the stability was & he said it was great, better than ever. At the end of the day, the car was running quicker & faster than we ever had.
The lesson here is ... that I have since experienced a zillion times over the next 25 years of racing ... you are wasting force energy ... be it down force or side force ... if the pressure on the panel gets lost
through flex in the body or body structure. And apparently, our "not so sharp" guy was right.
Think of it this way: If you're pushing on a panel with 80# ... and that panel and/or the supports flex ... that flex is eating up some or all of that 80#. It's like electricity running through wire that is too small of
a diameter for its length. You're not getting the same net result at the other end. Another analogy is chassis flex. If you send 800hp through the car, but the chassis & body flex a lot, that flex is eating up a bunch of your power.
Airflow over different shapes:
When designing a car to be more aerodynamic, it's important to know how air flows over different shapes, so you know what shape to use where. Remember the rain drop or tear drop shape is the most
aerodynamic. An airplane wing is simply an elongated tear drop shape ... to provide surface area for lift. Or in case of race cars, where it's flipped over ... surface area for down force.
Round is a great leading edge shape, but a horrible trailing edge shape. A piece of round tubing in the airflow stream has a lot of drag. For this reason race car designers of dragsters, Indy cars, GT
cars, etc, use aerodynamic tear drop tubing (aka Streamline Tubing) on struts or suspension pieces exposed to airflow.
Concave surfaces, slow the airflow speed, creating more air pressure & force. Convex surfaces increase the airflow speed, creating less air pressure ... even a pressure drop ... and therefore less force. Again, think how an airplane wing is designed. Smooth, flat surfaces are "ok" at creating force. They are less effective than concave & more effective than convex.
Speaking of concave. When you look at roof of cars with two "bubbles" where the passengers heads are ... what's in the middle? A concave area to create downforce. These car designers could have just
as easily made the roof flat or domed (convex) ... but that wouldn't optimize the airflow for downforce. Another example is with Trans Am cars & stock cars that are wider at the front & rear fender wells ... and narrower at the doors. This concave area creates side force, helping the car carry more cornering speed.
Airflow will follow convex shapes ... like a roof or fast back style back glass ... as long as the radius isn't too sharp. This is key in designing or deciding on windshield shape, roof shape & rear window
shape when designing & building a car from scratch. Or, important to understand if you're choosing a car body with the right shapes already on it. I love the 80's G-body style cars & had a Hurst/Olds style Cutlass drag car in the mid-80's. But I wouldn't choose that sharp notchback style for optimum aerodynamics with what I know today.
The decision to make body corners with sharp, hard 90° edges ... or gentle corners with a large radius ... depends on your goal. Where you want the airflow to stay attached ... for side force or downforce ... you want to use gentle corners with a large radius. This is what you want on the sides of the car's nose blending into the side fenders. Where you want the airflow to become quickly detached ... to break away cleanly ... you want to use sharp, hard 90° edges or even short wicker bills. You're starting to see sharp edges at the rear of production cars. That is to get the airflow to break away from the body & reduce drag ... increasing fuel mileage.
#40
Designing & Tuning Aerodynamics for Track & Racing / Re: Designing & Tuning Aerodyn...
Last post by Ron Sutton - Apr 15, 2026, 12:33 PMAerodynamic drag that we're concerned about in Road Race or Track Cars comes from three areas:
1. Frontal area
2. Surface turbulence
3. Flow detachment in the rear
Before we dive into each one, remember, anything you do that messes up the airflow in the front, will affect the air flow in the middle & rear of the car. For that matter, things that affect airflow in the middle, or rear, of the car ... can & have affected the air flow at the front. Just not always. One end doesn't operate by itself. Airflow is a "whole car" deal.
Frontal area drag:
Wind tunnels actually work backwards to how cars operate in the real world. In a wind tunnel the car is stationary & we blow wind past it at 120-160mph. In the real world the air is more or less stationary ... and this high speed object comes along at 120-160 mph & punches a hole in it. For this reason, most experienced aerodynamicists tell me they're "not looking for absolutes ... just clues & trends" in the wind tunnel.
The parts of the car that are punching a hole in the air ... are the nose & grill area of the front end ... and the greenhouse. The nose & grill area includes everything at the front of the car either flat, raked or
slightly curved. This includes the grill, headlights, bumper, spoiler, leading edge of the hood, etc. Most speed calculations that include aerodynamic drag numbers have you calculate the square inches of this area.
The next major part punching a hole through the air is the greenhouse. This may be a new term for some of you, but it is simply the part of the cockpit above the hood, doors & deck lid. The total greenhouse includes the windshield, side glass, A, B & C pillars, rear glass & roof. But the parts punching a hole in the air include the windshield, A-pillars & leading edge of the roof.
Obviously, the highest pressure area in a car is the nose & grill area. The second highest pressure area is at the base of the windshield where the airflow over the hood surfaces meets the steep angle of the
windshield. This is where the air is pulled from for cowl induction with no negative effects.
Both the nose/front end & front of the greenhouse need to taken into account for true surface area pushing through the air stream. Both of these create less "air stall" and drag if they are raked back at an angle. The more the better ... up to a point far past what we're capable of achieving in our Race & Track Cars.
Bow Wave:
As the car punches a hole in the air, it is creating a "wave" of air bowed around the front of the car. Think of a boat pushing through water ... if it had a shape of your car's front end ... instead of the pointed V-hull/bow it has. This is called the "bow wave" and can be as close as 3' or as far out as 30' depending on the car's speed and the shape & rake of the nose & grill area. Rake angle plays the biggest role here. Raked noses are going to push the bow wave out the least & 90° vertical noses are going to push the bow wave out the most.
Why do you care?
• The farther the bow wave is pushed out by the nose shape & rake ... the more drag the car has ... with no gain in downforce.
• If the bow wave is bigger (height & width) ... and too far out front ... the air will not attach itself to the car. This is bad. More later.
• In lesser cases, it affects the front of the car ... so no front downforce.
• Of course any airflow surface detachment at the front, will negatively affect the rear too.
• In worst case scenarios, the bow wave directs airflow over the whole car creating horrible lift & drag.
Surface turbulence drag:
The air flowing over the body surface is called the boundary layer. This layer of air tends to adhere or "attach" to the body because air has viscosity. There are two types of flow possible in a boundary layer:
laminar flow or turbulent flow. In nonscientific terms laminar flow is a super thin (thousandths of an inch), super smooth layer of airflow that acts almost frictionless. Race engineers tell me that laminar flow does
not exist in race cars or Track Cars in any quantity to matter, so the discussion in moot.
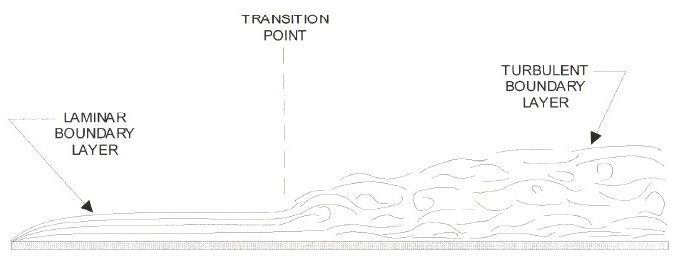
In nonscientific terms turbulent flow is "rough" where airflow tumbles and rolls as it flows over the surface, causing friction. Turbulence, tumble & friction are tied together ... but it's not all or
nothing. You have different levels of turbulence, tumble & friction in different parts of the body. Even though the airflow is turbulent ... up to a degree ... it can still be "attached". Imagine a tumbleweed blowing along the ground in a gentle wind. It is "rolling" or "tumbling", but it is still touching the ground in most spots. Cars have turbulent airflow over the body ... to different degrees.
This tumbling & rolling of the airflow creates drag & reduces down force. The less turbulent the air is over the body, the less drag created & the more downforce created. So simply smoothing out the
airflow over the existing body shape ... so more of the boundary layer of air stays "attached" ... reduces drag & increases downforce. In parts of the body where you have high degrees of turbulence, tumble & friction ... the airflow detaches ... and drag skyrockets while downforce goes to practically nothing. If you can lower the degree of turbulence, tumble & friction in this part of the body ... and the airflow can stay attached ... you will reduce drag dramatically & increase downforce significantly ... in that part of the body. The more areas of the car you can keep the air attached to the body, the less drag & more downforce the total car will have.
Keeping this simple:
• Smoother airflow = less drag & more downforce
• Rougher airflow = more drag & less downforce
With a good, smooth, aerodynamic body design, aero drag increases at about the square of the increase in speed. With more turbulent airflow over the body, aero drag increases at a higher rate than normal. Anything you do to smooth out airflow ... that effectively keeps the boundary layer better attached in more parts of the body ... will make your car faster on track. We can see this in the wind tunnel with the smoke wand. The better the smoke follows the contour of the car, the more attached airflow we have. If it's not, we have flow separation issues to fix.
Flow detachment creates rear drag:
The ideal shape going through the air is a tear drop or rain drop shape. The rear of a tear drop shape allows the airflow going around the mass to meet & merge back together smoothly, like the trailing edge of an airplane wing. This shape produces minimal turbulence. But cars don't fly through the air ... hopefully. Obviously cars run on the ground ... which adds a surface into the equation ... so cars are not tear drop shaped.
Manufacturers have been improving the aerodynamic shape of cars for several decades, to where now ... to me at least ... so many body styles of family sedans look similar. They do go through the air better, but many of them look like painted turds. I'll have to check with some people and see if that is an acceptable technical term for an aerodynamics discussion.
All cars have turbulence behind them as the car punches a hole in the air ... forcing the air in many directions. How much air goes which direction is based on the shape of the car. Most Track cars with body styles from the 50's to the 80's with more style ... have more turbulence behind the car as it punches a hole in the air.
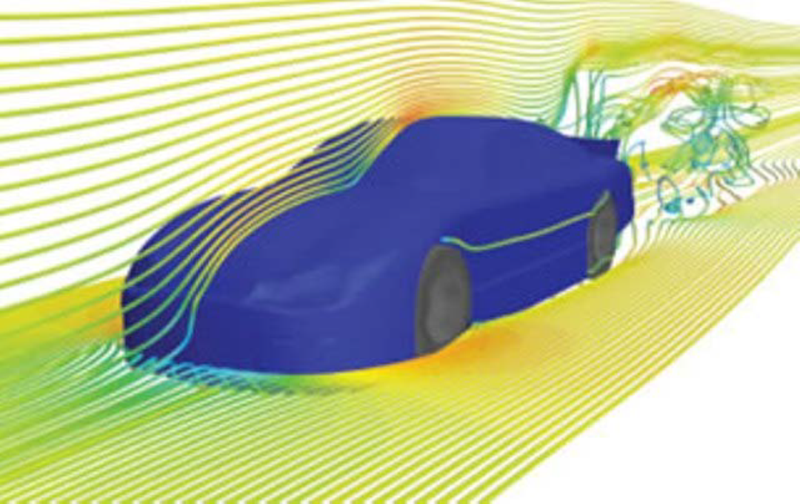
This is because the shape of these cars is not conducive to the air going around the body and rejoining together smoothly. The airflow detaches itself from the rear of body ... then tumbles & churns ... creating a vacuum effect. This vacuum effect sucks the air back to where it started from. Since the car is traveling at speed, this turbulence behind the car forms a continuous vacuum that sucks on the back of the car as it drives along ... creating constant drag from the rear of the car.
While it is not practical to create a tear drop shaped car ... it's been done ... you do want the air behind your car to flow back together as smoothly & gently as possible, with the least amount of turbulence &
drag. If you do nothing to improve it ... at least don't do anything to make it worse.
Total Aero Drag:
The total aero drag of the car is the combination of rear drag created by flow detachment, frontal area of the nose & greenhouse and surface turbulence. The rear drag created by flow detachment makes up the
majority of the drag ... with the frontal area of the nose & greenhouse being second in contributing ... and the surface turbulence drag contributing the least. The exception to this would be vehicles with a
lot of objects affecting the surface airflow.
Understanding Airflow:
Turbulence comes in many variations, with many causes. When airflow changes from smooth tumbling flow which is good ... to churning, boiling or crashing ... we have excessive turbulence. In most cases,
turbulence is our enemy, and our goal is to simply reduce it. Excessive turbulence adds drag, eating horsepower & speed.
Over key parts of the body or wing, where we need to create downforce, excessive turbulence interferes with us achieving optimum downforce. The bulk of aero lift comes from the air traveling under the
car ... running into objects like oil pans, headers, transmission, exhaust, suspension, etc ... becoming turbulent & slowing the air flow speed. This creates lift because the air underneath can't get out as fast
as new air is coming in the front.
Smooth body work & gentle radius curves help air flow smoothly over a car body. Excessive turbulence is often caused by the opposite of smooth & gentle. When you can accurately describe parts of the body
as abrupt, sharp, severe ... those things will most likely create turbulence. The notchback style roofline of an 80's Monte Carlo, Cutlass, Grand Prix & Regal all had a sharp trailing edge to the roof.
This caused the air to "break away"... churn & crash ... therefore create excessive turbulence ... over the deck lid. If the air isn't flowing over the deck lid smoothly ... therefore it is not "attached" ... you will have less downforce in the rear. It was so bad the NASCAR teams running these cars convinced GM to make some with the "aero rear window" to help the problem. It didn't solve the problem. It just made it less horrible.
The late 80's thunderbird had a much smoother transition from roof to back window to deck lid. That car made way more downforce & won a ton of races in Bill Elliott's heyday, forcing GM to go away from "square cars" & introduce the more rounded, smoother Lumina.
Transitions are important. Transitions from hood to windshield ... windshield to greenhouse ... roof to back window ... back window to deck lid ... all need to be smoothed to minimize turbulence. Body gaps,
steps, sharp edges ... anything protruding up or out ... all increase turbulence. If the air is flowing over a smooth surface and runs into a "step" ... this step disrupts the smooth flow ... causing the air to jump
up into another airstream. This airflow running into airflow creates a buffeting effect ... and disrupts the airflow past this point.
1. Frontal area
2. Surface turbulence
3. Flow detachment in the rear
Before we dive into each one, remember, anything you do that messes up the airflow in the front, will affect the air flow in the middle & rear of the car. For that matter, things that affect airflow in the middle, or rear, of the car ... can & have affected the air flow at the front. Just not always. One end doesn't operate by itself. Airflow is a "whole car" deal.
Frontal area drag:
Wind tunnels actually work backwards to how cars operate in the real world. In a wind tunnel the car is stationary & we blow wind past it at 120-160mph. In the real world the air is more or less stationary ... and this high speed object comes along at 120-160 mph & punches a hole in it. For this reason, most experienced aerodynamicists tell me they're "not looking for absolutes ... just clues & trends" in the wind tunnel.
The parts of the car that are punching a hole in the air ... are the nose & grill area of the front end ... and the greenhouse. The nose & grill area includes everything at the front of the car either flat, raked or
slightly curved. This includes the grill, headlights, bumper, spoiler, leading edge of the hood, etc. Most speed calculations that include aerodynamic drag numbers have you calculate the square inches of this area.
The next major part punching a hole through the air is the greenhouse. This may be a new term for some of you, but it is simply the part of the cockpit above the hood, doors & deck lid. The total greenhouse includes the windshield, side glass, A, B & C pillars, rear glass & roof. But the parts punching a hole in the air include the windshield, A-pillars & leading edge of the roof.
Obviously, the highest pressure area in a car is the nose & grill area. The second highest pressure area is at the base of the windshield where the airflow over the hood surfaces meets the steep angle of the
windshield. This is where the air is pulled from for cowl induction with no negative effects.
Both the nose/front end & front of the greenhouse need to taken into account for true surface area pushing through the air stream. Both of these create less "air stall" and drag if they are raked back at an angle. The more the better ... up to a point far past what we're capable of achieving in our Race & Track Cars.
Bow Wave:
As the car punches a hole in the air, it is creating a "wave" of air bowed around the front of the car. Think of a boat pushing through water ... if it had a shape of your car's front end ... instead of the pointed V-hull/bow it has. This is called the "bow wave" and can be as close as 3' or as far out as 30' depending on the car's speed and the shape & rake of the nose & grill area. Rake angle plays the biggest role here. Raked noses are going to push the bow wave out the least & 90° vertical noses are going to push the bow wave out the most.
Why do you care?
• The farther the bow wave is pushed out by the nose shape & rake ... the more drag the car has ... with no gain in downforce.
• If the bow wave is bigger (height & width) ... and too far out front ... the air will not attach itself to the car. This is bad. More later.
• In lesser cases, it affects the front of the car ... so no front downforce.
• Of course any airflow surface detachment at the front, will negatively affect the rear too.
• In worst case scenarios, the bow wave directs airflow over the whole car creating horrible lift & drag.
Surface turbulence drag:
The air flowing over the body surface is called the boundary layer. This layer of air tends to adhere or "attach" to the body because air has viscosity. There are two types of flow possible in a boundary layer:
laminar flow or turbulent flow. In nonscientific terms laminar flow is a super thin (thousandths of an inch), super smooth layer of airflow that acts almost frictionless. Race engineers tell me that laminar flow does
not exist in race cars or Track Cars in any quantity to matter, so the discussion in moot.
In nonscientific terms turbulent flow is "rough" where airflow tumbles and rolls as it flows over the surface, causing friction. Turbulence, tumble & friction are tied together ... but it's not all or
nothing. You have different levels of turbulence, tumble & friction in different parts of the body. Even though the airflow is turbulent ... up to a degree ... it can still be "attached". Imagine a tumbleweed blowing along the ground in a gentle wind. It is "rolling" or "tumbling", but it is still touching the ground in most spots. Cars have turbulent airflow over the body ... to different degrees.
This tumbling & rolling of the airflow creates drag & reduces down force. The less turbulent the air is over the body, the less drag created & the more downforce created. So simply smoothing out the
airflow over the existing body shape ... so more of the boundary layer of air stays "attached" ... reduces drag & increases downforce. In parts of the body where you have high degrees of turbulence, tumble & friction ... the airflow detaches ... and drag skyrockets while downforce goes to practically nothing. If you can lower the degree of turbulence, tumble & friction in this part of the body ... and the airflow can stay attached ... you will reduce drag dramatically & increase downforce significantly ... in that part of the body. The more areas of the car you can keep the air attached to the body, the less drag & more downforce the total car will have.
Keeping this simple:
• Smoother airflow = less drag & more downforce
• Rougher airflow = more drag & less downforce
With a good, smooth, aerodynamic body design, aero drag increases at about the square of the increase in speed. With more turbulent airflow over the body, aero drag increases at a higher rate than normal. Anything you do to smooth out airflow ... that effectively keeps the boundary layer better attached in more parts of the body ... will make your car faster on track. We can see this in the wind tunnel with the smoke wand. The better the smoke follows the contour of the car, the more attached airflow we have. If it's not, we have flow separation issues to fix.
Flow detachment creates rear drag:
The ideal shape going through the air is a tear drop or rain drop shape. The rear of a tear drop shape allows the airflow going around the mass to meet & merge back together smoothly, like the trailing edge of an airplane wing. This shape produces minimal turbulence. But cars don't fly through the air ... hopefully. Obviously cars run on the ground ... which adds a surface into the equation ... so cars are not tear drop shaped.
Manufacturers have been improving the aerodynamic shape of cars for several decades, to where now ... to me at least ... so many body styles of family sedans look similar. They do go through the air better, but many of them look like painted turds. I'll have to check with some people and see if that is an acceptable technical term for an aerodynamics discussion.
All cars have turbulence behind them as the car punches a hole in the air ... forcing the air in many directions. How much air goes which direction is based on the shape of the car. Most Track cars with body styles from the 50's to the 80's with more style ... have more turbulence behind the car as it punches a hole in the air.
This is because the shape of these cars is not conducive to the air going around the body and rejoining together smoothly. The airflow detaches itself from the rear of body ... then tumbles & churns ... creating a vacuum effect. This vacuum effect sucks the air back to where it started from. Since the car is traveling at speed, this turbulence behind the car forms a continuous vacuum that sucks on the back of the car as it drives along ... creating constant drag from the rear of the car.
While it is not practical to create a tear drop shaped car ... it's been done ... you do want the air behind your car to flow back together as smoothly & gently as possible, with the least amount of turbulence &
drag. If you do nothing to improve it ... at least don't do anything to make it worse.
Total Aero Drag:
The total aero drag of the car is the combination of rear drag created by flow detachment, frontal area of the nose & greenhouse and surface turbulence. The rear drag created by flow detachment makes up the
majority of the drag ... with the frontal area of the nose & greenhouse being second in contributing ... and the surface turbulence drag contributing the least. The exception to this would be vehicles with a
lot of objects affecting the surface airflow.
Understanding Airflow:
Turbulence comes in many variations, with many causes. When airflow changes from smooth tumbling flow which is good ... to churning, boiling or crashing ... we have excessive turbulence. In most cases,
turbulence is our enemy, and our goal is to simply reduce it. Excessive turbulence adds drag, eating horsepower & speed.
Over key parts of the body or wing, where we need to create downforce, excessive turbulence interferes with us achieving optimum downforce. The bulk of aero lift comes from the air traveling under the
car ... running into objects like oil pans, headers, transmission, exhaust, suspension, etc ... becoming turbulent & slowing the air flow speed. This creates lift because the air underneath can't get out as fast
as new air is coming in the front.
Smooth body work & gentle radius curves help air flow smoothly over a car body. Excessive turbulence is often caused by the opposite of smooth & gentle. When you can accurately describe parts of the body
as abrupt, sharp, severe ... those things will most likely create turbulence. The notchback style roofline of an 80's Monte Carlo, Cutlass, Grand Prix & Regal all had a sharp trailing edge to the roof.
This caused the air to "break away"... churn & crash ... therefore create excessive turbulence ... over the deck lid. If the air isn't flowing over the deck lid smoothly ... therefore it is not "attached" ... you will have less downforce in the rear. It was so bad the NASCAR teams running these cars convinced GM to make some with the "aero rear window" to help the problem. It didn't solve the problem. It just made it less horrible.
The late 80's thunderbird had a much smoother transition from roof to back window to deck lid. That car made way more downforce & won a ton of races in Bill Elliott's heyday, forcing GM to go away from "square cars" & introduce the more rounded, smoother Lumina.
Transitions are important. Transitions from hood to windshield ... windshield to greenhouse ... roof to back window ... back window to deck lid ... all need to be smoothed to minimize turbulence. Body gaps,
steps, sharp edges ... anything protruding up or out ... all increase turbulence. If the air is flowing over a smooth surface and runs into a "step" ... this step disrupts the smooth flow ... causing the air to jump
up into another airstream. This airflow running into airflow creates a buffeting effect ... and disrupts the airflow past this point.