Recent posts
#11
Client Projects & Tips – Muscle Cars / Re: Brakes
Last post by Scot McMillan Jr - Apr 27, 2026, 04:43 PMWe run them on street driving applications when the calipers are higher than the master cylinder reservoir. But as Ron mentioned if you are trying to race with them they will not let the brake cool properly due to the little bit of drag left in the system. It has been by experience that the pumping you are referring to could be being caused by brake knock back.
#12
Client Projects & Tips – Tube Chassis / Re: Scope creep '69 Cougar
Last post by Ryan Kennedy - Apr 26, 2026, 04:34 PMRear brakes. Sigh...well...not sigh...totally awesome! The rear brackets made for the Brembo calipers weren't going to work in any way, and there was an upgrade I had been eyeballing for a while in terms of adjustability, safety, and longevity. I originally chose the 8.8 for its lighter weight and lesser power consumption. Strength between the 9" and 8.8" is almost the same, but the ability to have multiple chunks setup with different ratios or even different differentials, is an undeniable advantage of the 9" axle.
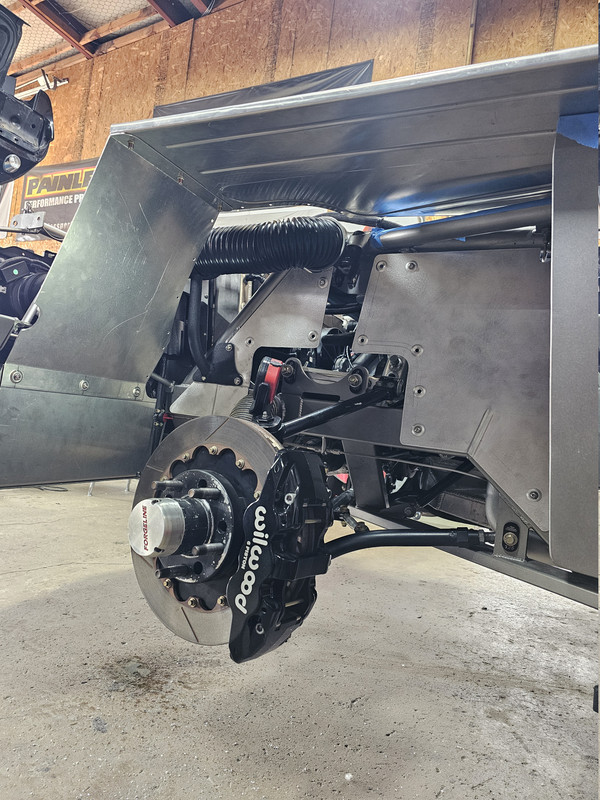
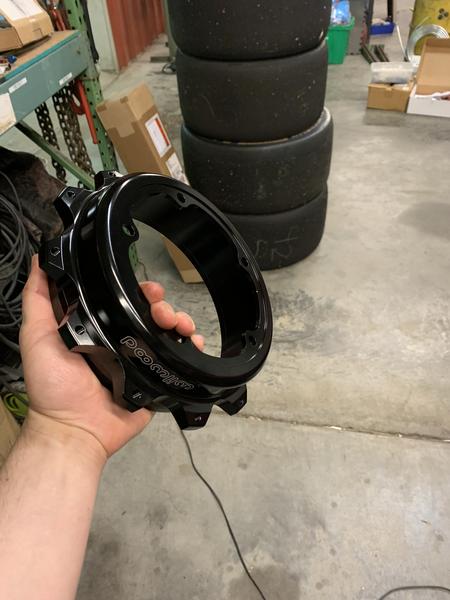
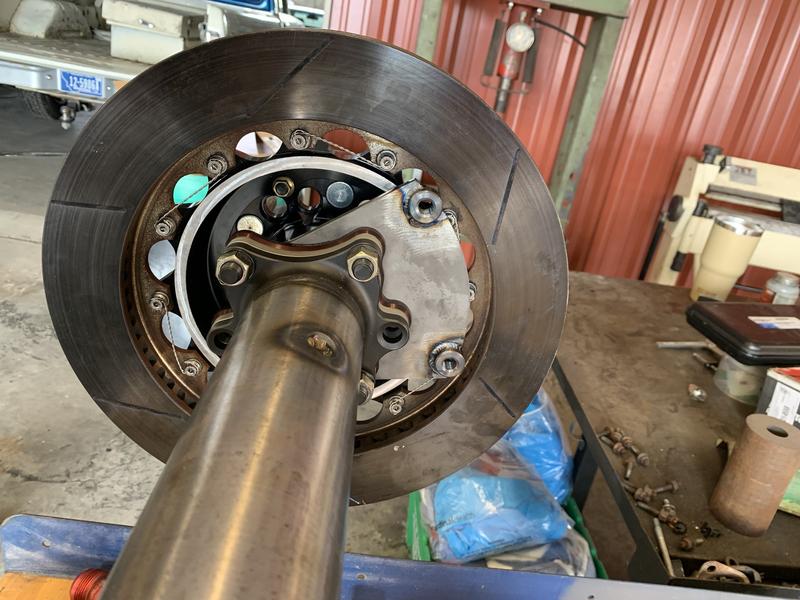
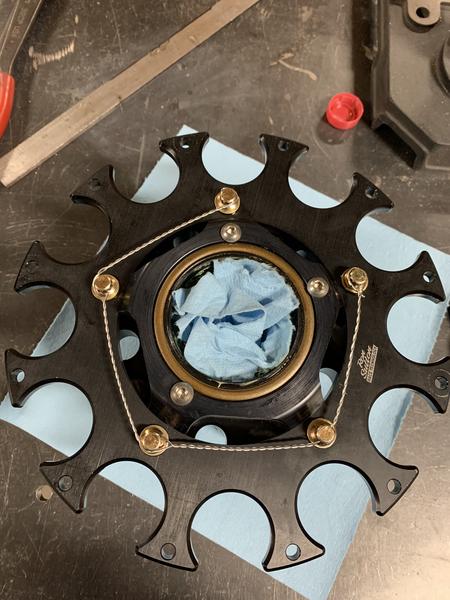
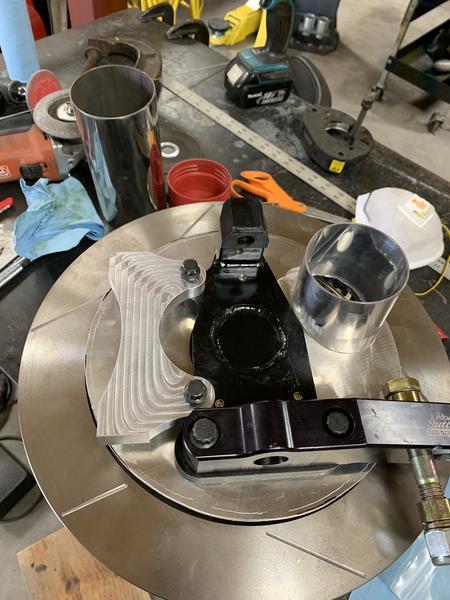
After learning so much through the build it was clear why cars that run solid axles and make a lot of grip run a floating setup. There are a few setups on the market for converting to a full floater but the one that had my eye on, was from Strange Engineering. They have two different versions - one is just a normal floating setup and the other is a camber and toe adjustable setup. They call it their "Pro-touring Floater Kit". It uses a weld on snout for the axle and a bolt on spindle up to -2.5* of camber. Between the snout and the spindle, there's a spacer plate that can change toe if you desire. Also, the setup uses a hub mounted rotor. Its a Wilwood adapter that can accommodate a parking brake, but I don't want a parking brake so I machined the back of the hat off to try and save some weight.
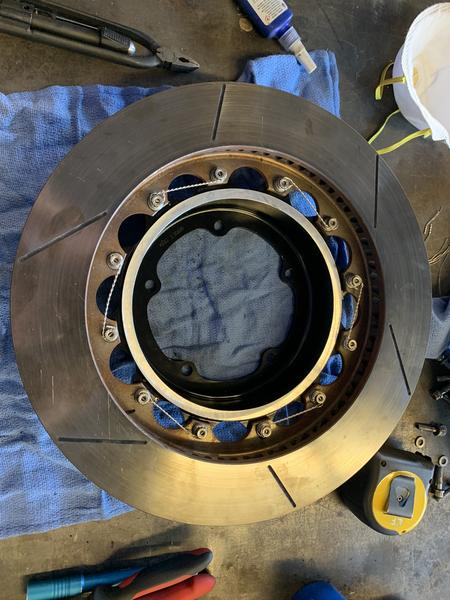
I Probably could have bored out the parking brake hat a little instead of just taking the backside of it down, but I'm no engineer and I didn't want to weaken the bell.
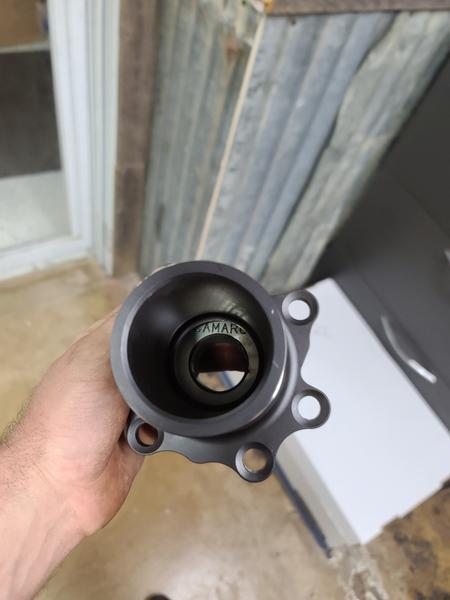
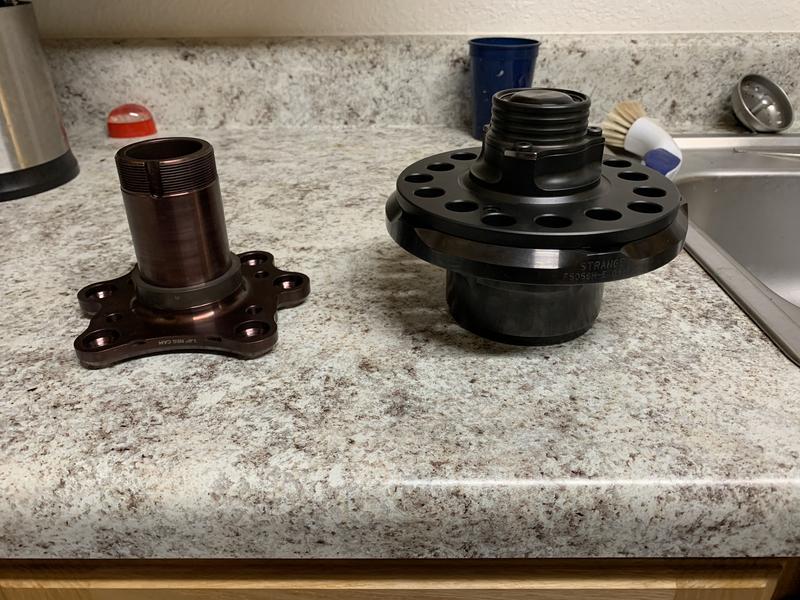

The Strange setup uses a crowned spline axle and a pair of large tapered roller bearings, similar to our friends in NASCAR. There is another setup offered by those crazy Aussie's used in V8 Supercar that incorporates more of a CV joint at the outer end of the axle. Friend of mine bought that setup and is currently installing it. Guilt trips have yet to get him on here.
And this is where the wheels fall off the bus. Not having a jig for building axles, I gave my 8.8 to Scot Rods Garage for the conversion to the floating snout, and shortly after, received a phone call for full stop.
I cannot blame Griggs racing for the next part, but a heads up would have been nice. Much earlier on in the project, I had to obtain and send an 8.8 housing to them for camber modification. I never saw the car the axle came out of, but apparently it was a small tube/thin wall axle. Not knowing any better, I bought it, stripped it, and shipped it - my fault. Doing racing things, I would have hoped to get a call that a different axle would suit my needs better. No such call. Now I had a decision to make. Outfit the 8.8 I have with a really nice floater setup that one day might bend, or start over.
Soooo I chose to start over.
.jpg)
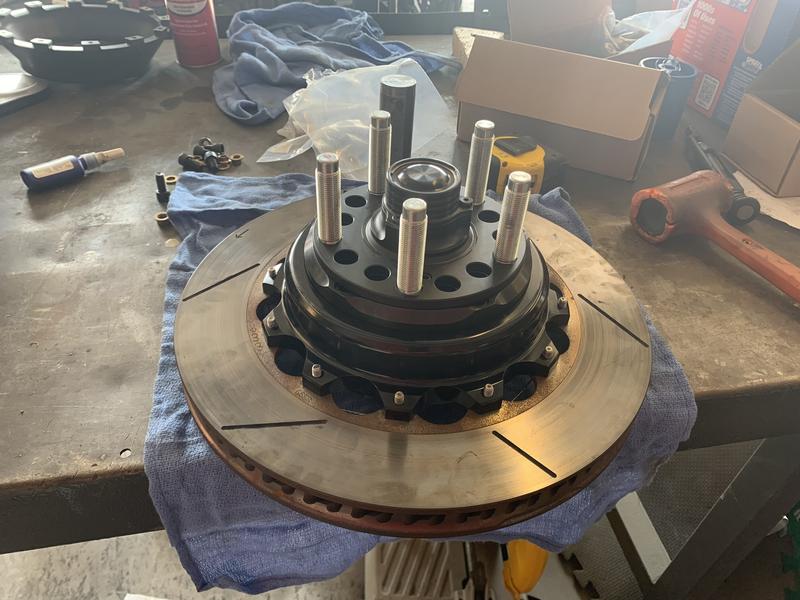
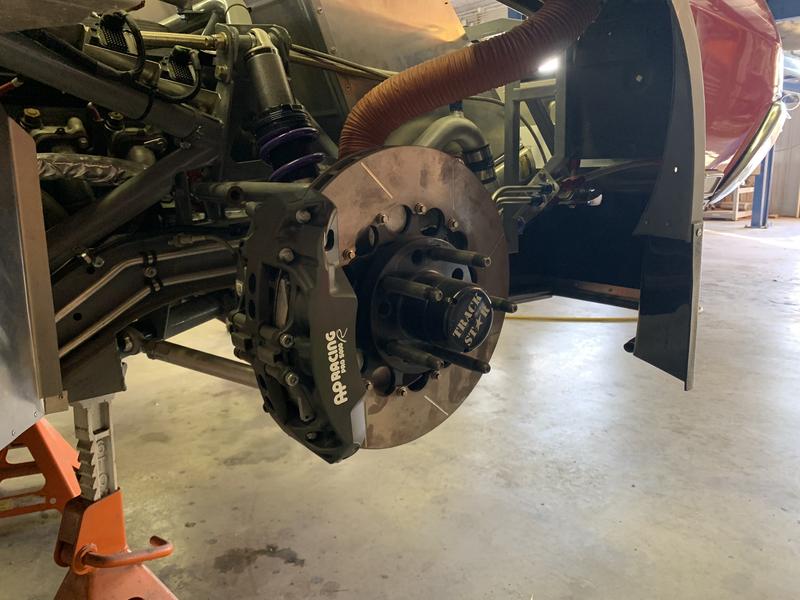
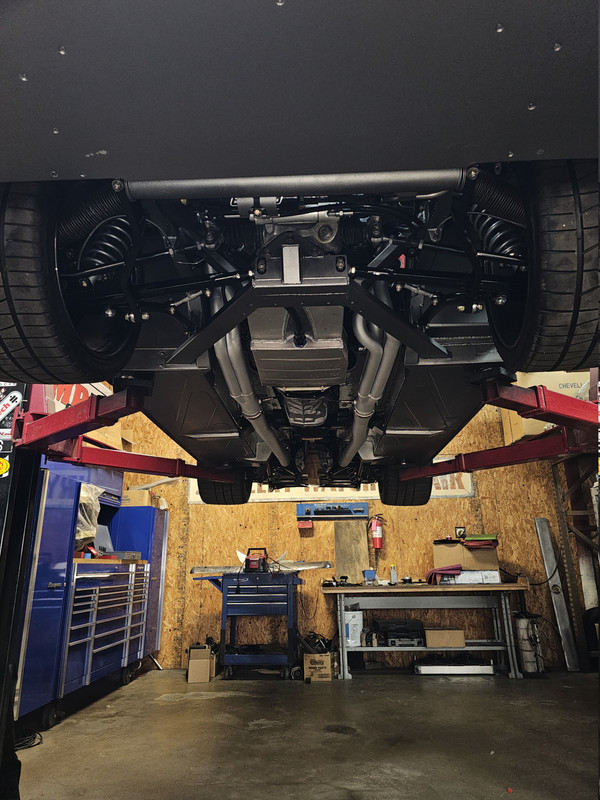
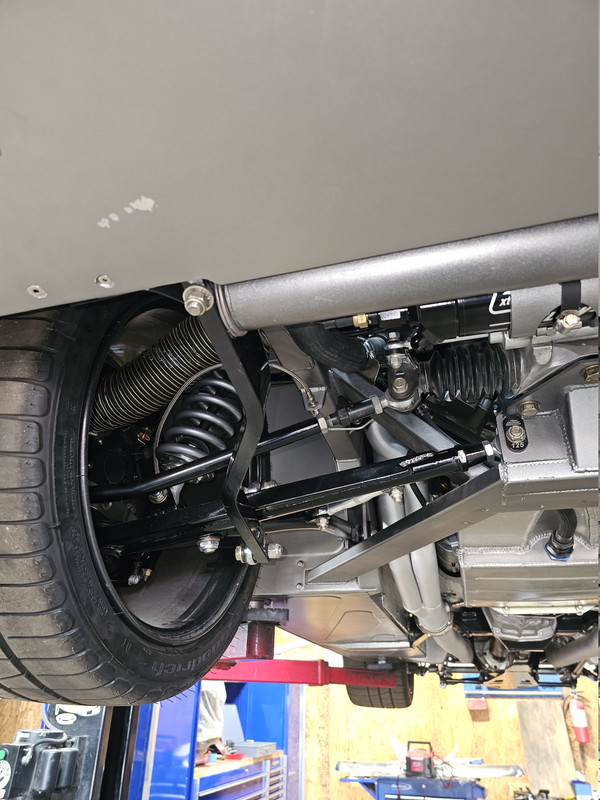
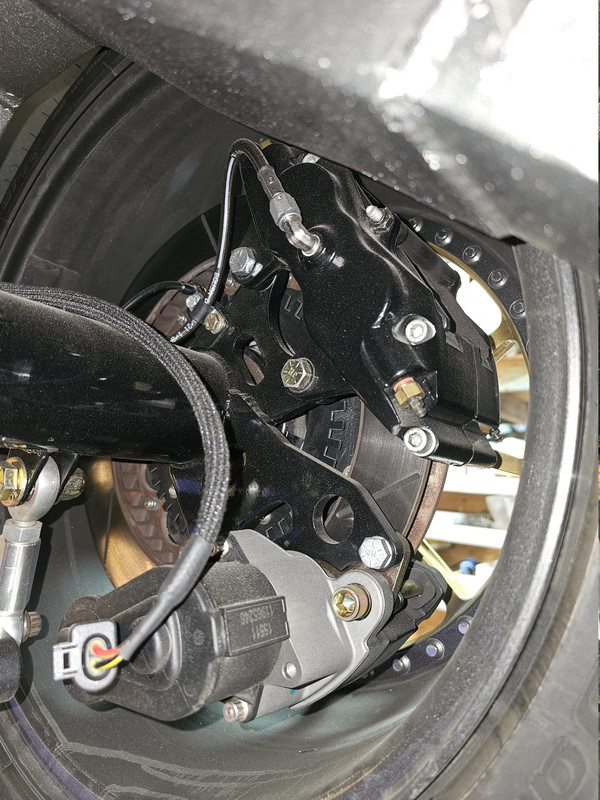
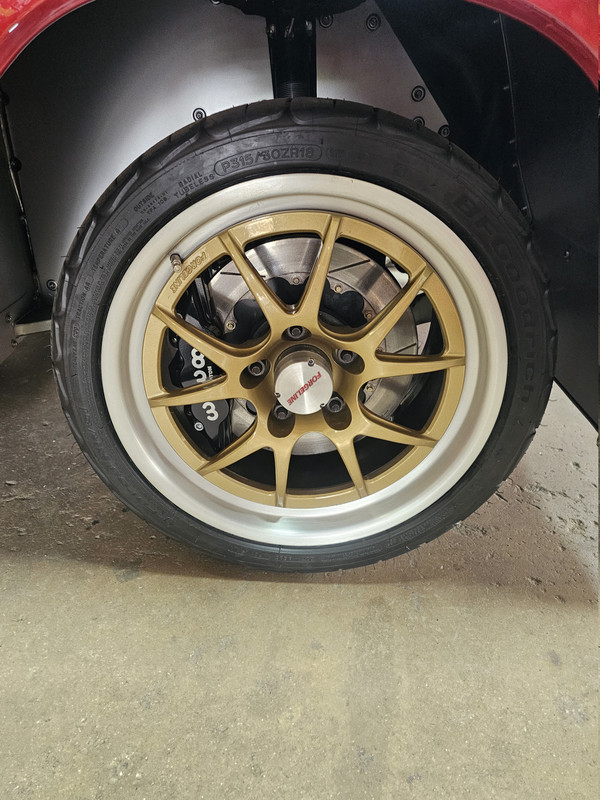
The 5-bolt pattern seen here is the same pattern and mounting that would have been used if the Wilwood brake kit designed for this floater setup was used.
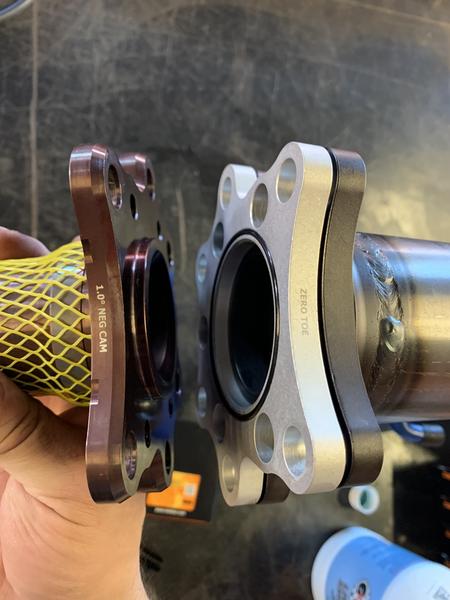
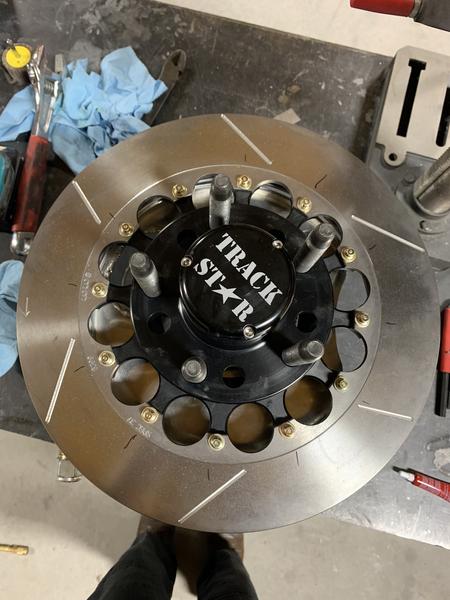
You can see the spindles are labeled -1* and the middle plate that controls toe is set for zero toe. Talking with others who run a similar size tire and IRS are dialing in between -1 and -1.5* of static camber. We'll see what the tire temps say.
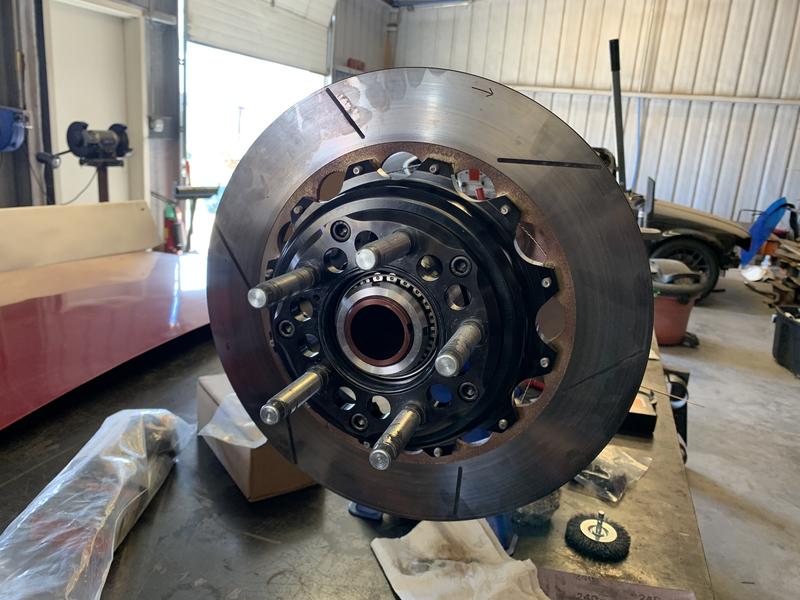
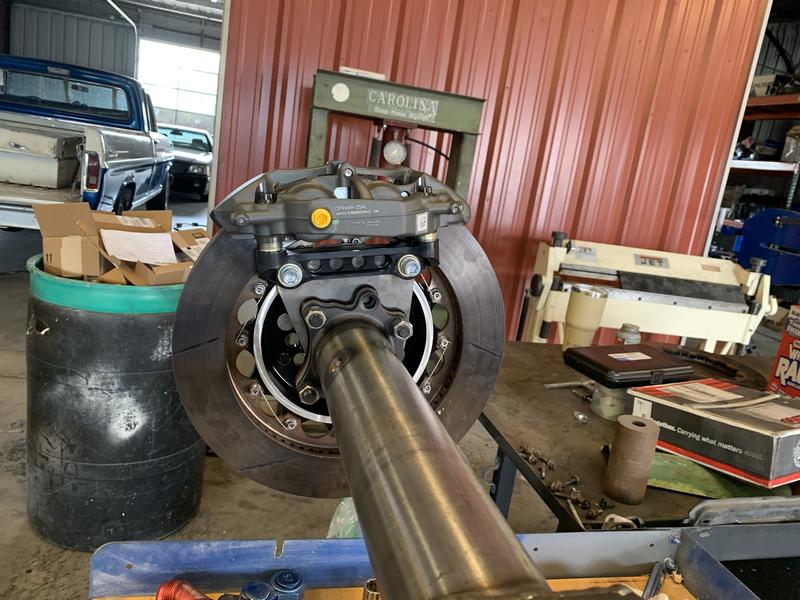
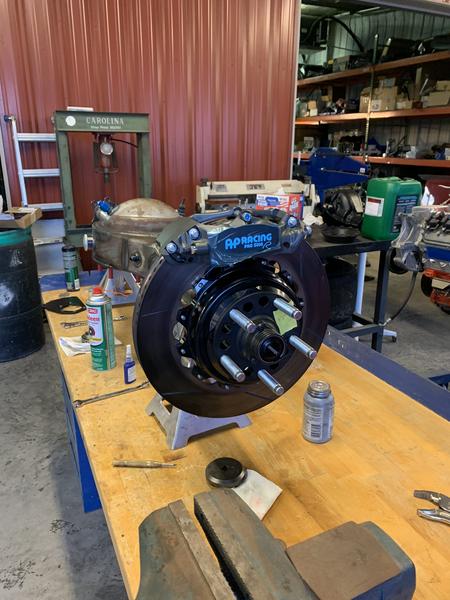
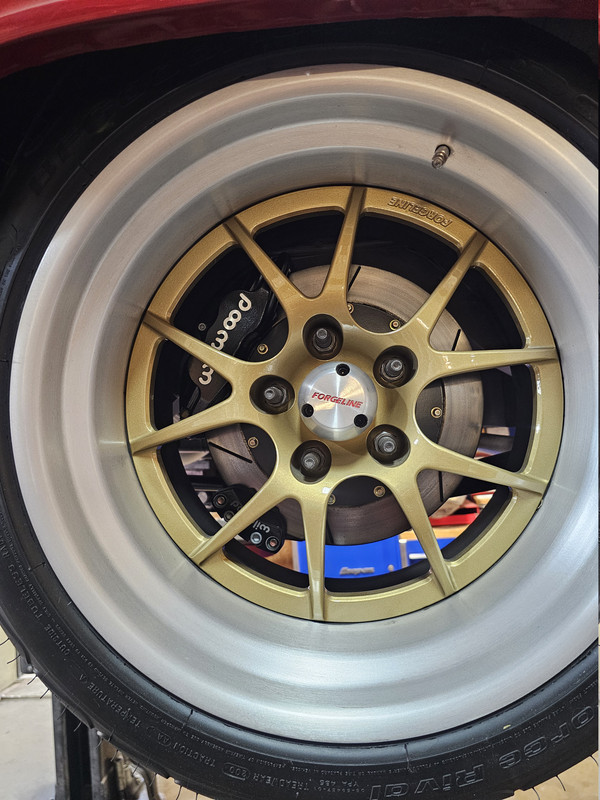
The rear rotors stayed a 14", which is probably too big, but if you look at the calipers installed, I built the brackets with spacers that can be removed to accommodate a smaller rotor without remaking the brackets.
There's one other aspect of this particular floater setup that I'm on the fence about. Typical floating setups need to have the axle position, or depth, adjusted by bolts on the inside end of the axle that ride on the differential cross pin. This setup has a special cap and bolt that rides on the outer end of the axle that keeps the axle in place by attaching it to the dust cap. I understand why Strange did this; it makes servicing a setup easier. I don't have an issue with the method, but it makes the axles a special part number and therefore more expensive, and only available through Strange.
Now I have rear brakes! What about the torque arm? What indeed...
After learning so much through the build it was clear why cars that run solid axles and make a lot of grip run a floating setup. There are a few setups on the market for converting to a full floater but the one that had my eye on, was from Strange Engineering. They have two different versions - one is just a normal floating setup and the other is a camber and toe adjustable setup. They call it their "Pro-touring Floater Kit". It uses a weld on snout for the axle and a bolt on spindle up to -2.5* of camber. Between the snout and the spindle, there's a spacer plate that can change toe if you desire. Also, the setup uses a hub mounted rotor. Its a Wilwood adapter that can accommodate a parking brake, but I don't want a parking brake so I machined the back of the hat off to try and save some weight.
I Probably could have bored out the parking brake hat a little instead of just taking the backside of it down, but I'm no engineer and I didn't want to weaken the bell.
The Strange setup uses a crowned spline axle and a pair of large tapered roller bearings, similar to our friends in NASCAR. There is another setup offered by those crazy Aussie's used in V8 Supercar that incorporates more of a CV joint at the outer end of the axle. Friend of mine bought that setup and is currently installing it. Guilt trips have yet to get him on here.
And this is where the wheels fall off the bus. Not having a jig for building axles, I gave my 8.8 to Scot Rods Garage for the conversion to the floating snout, and shortly after, received a phone call for full stop.
I cannot blame Griggs racing for the next part, but a heads up would have been nice. Much earlier on in the project, I had to obtain and send an 8.8 housing to them for camber modification. I never saw the car the axle came out of, but apparently it was a small tube/thin wall axle. Not knowing any better, I bought it, stripped it, and shipped it - my fault. Doing racing things, I would have hoped to get a call that a different axle would suit my needs better. No such call. Now I had a decision to make. Outfit the 8.8 I have with a really nice floater setup that one day might bend, or start over.
Soooo I chose to start over.
The 5-bolt pattern seen here is the same pattern and mounting that would have been used if the Wilwood brake kit designed for this floater setup was used.
You can see the spindles are labeled -1* and the middle plate that controls toe is set for zero toe. Talking with others who run a similar size tire and IRS are dialing in between -1 and -1.5* of static camber. We'll see what the tire temps say.
The rear rotors stayed a 14", which is probably too big, but if you look at the calipers installed, I built the brackets with spacers that can be removed to accommodate a smaller rotor without remaking the brackets.
There's one other aspect of this particular floater setup that I'm on the fence about. Typical floating setups need to have the axle position, or depth, adjusted by bolts on the inside end of the axle that ride on the differential cross pin. This setup has a special cap and bolt that rides on the outer end of the axle that keeps the axle in place by attaching it to the dust cap. I understand why Strange did this; it makes servicing a setup easier. I don't have an issue with the method, but it makes the axles a special part number and therefore more expensive, and only available through Strange.
Now I have rear brakes! What about the torque arm? What indeed...
#13
Client Projects & Tips – Tube Chassis / Re: Scope creep '69 Cougar
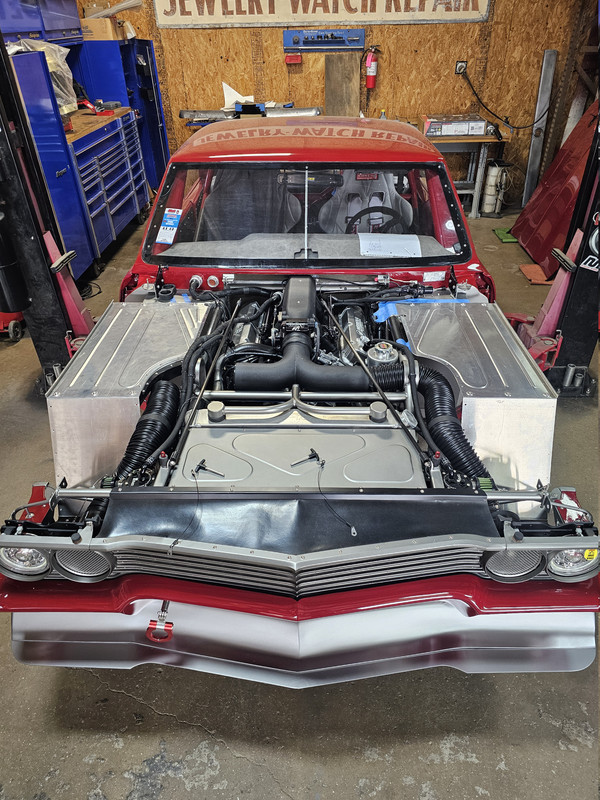
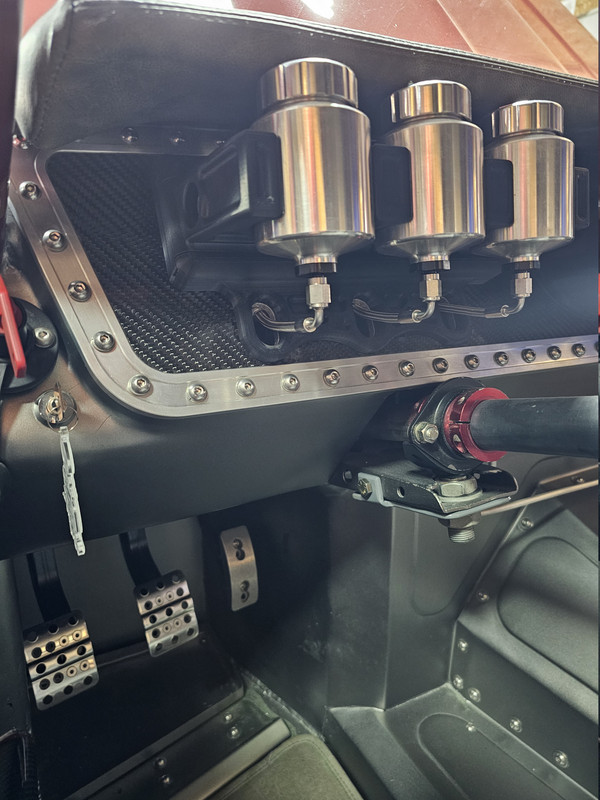
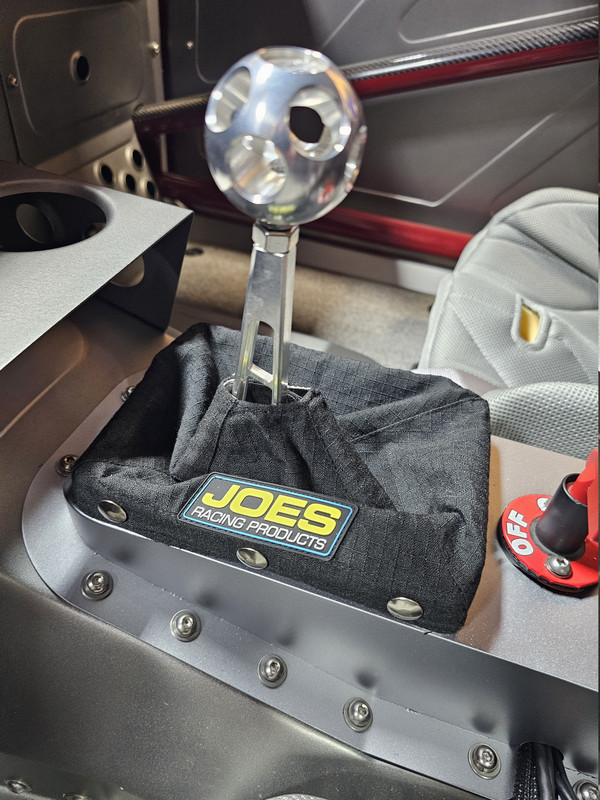
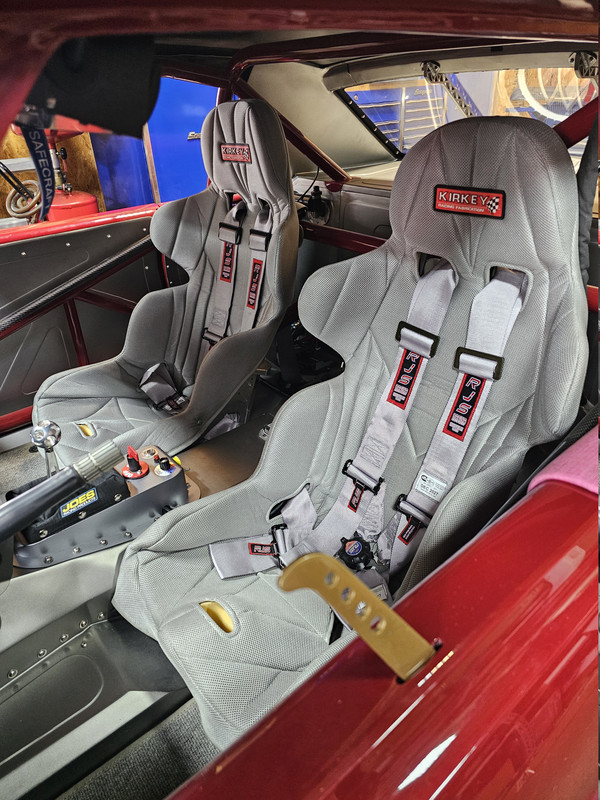
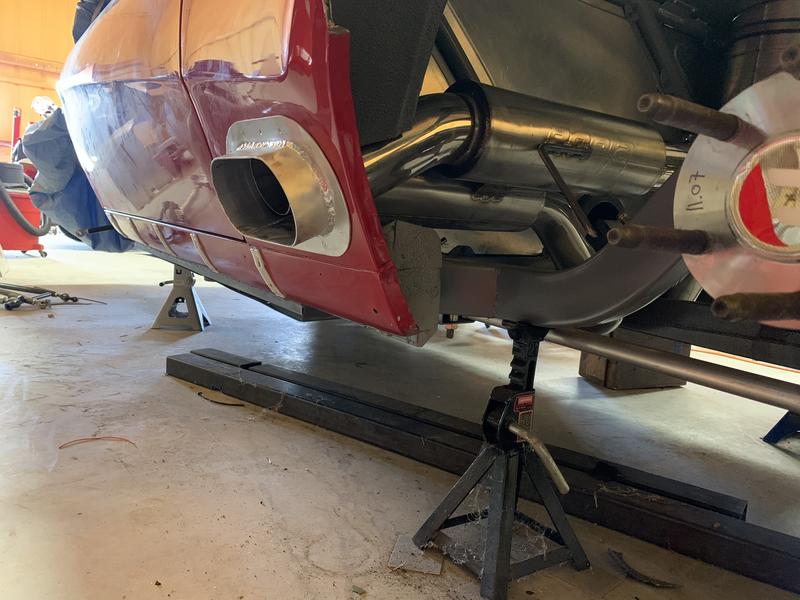
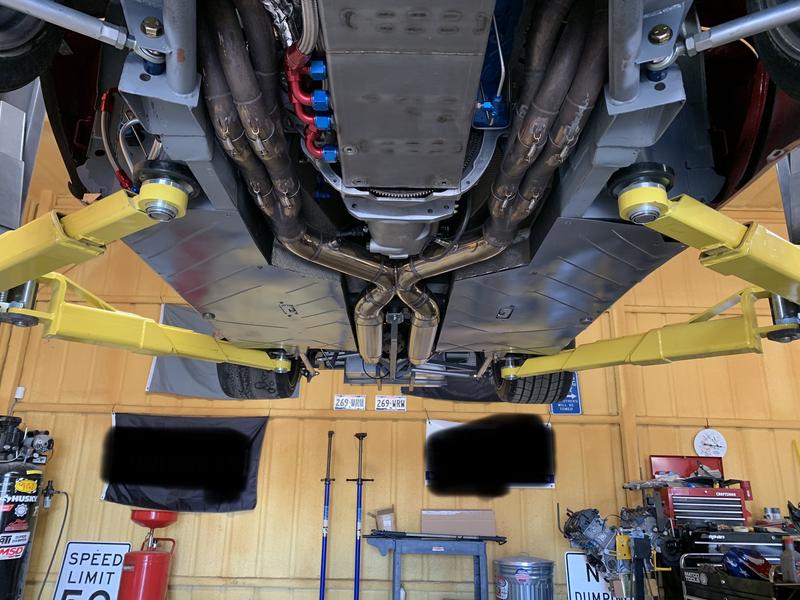
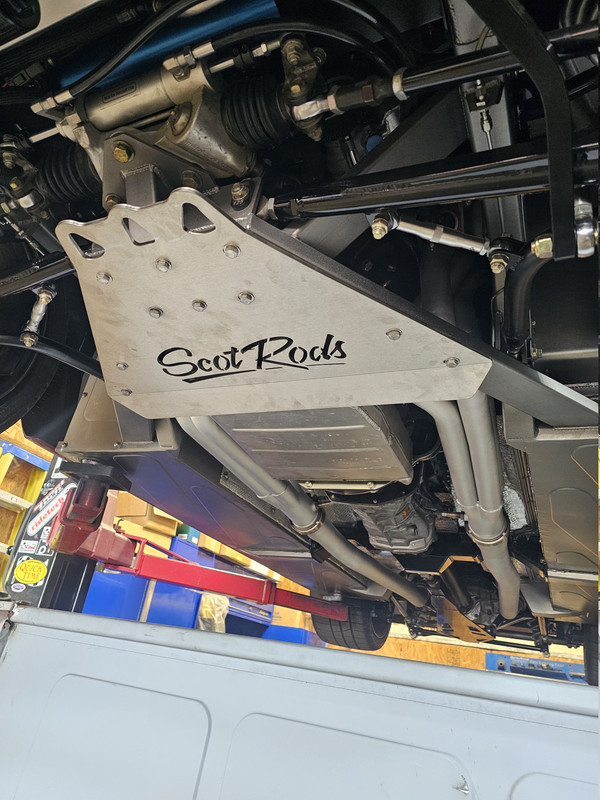
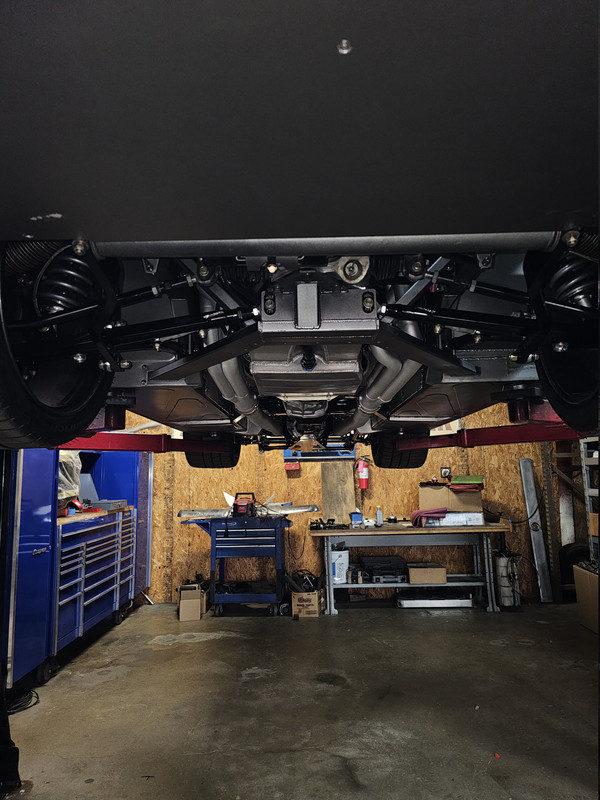
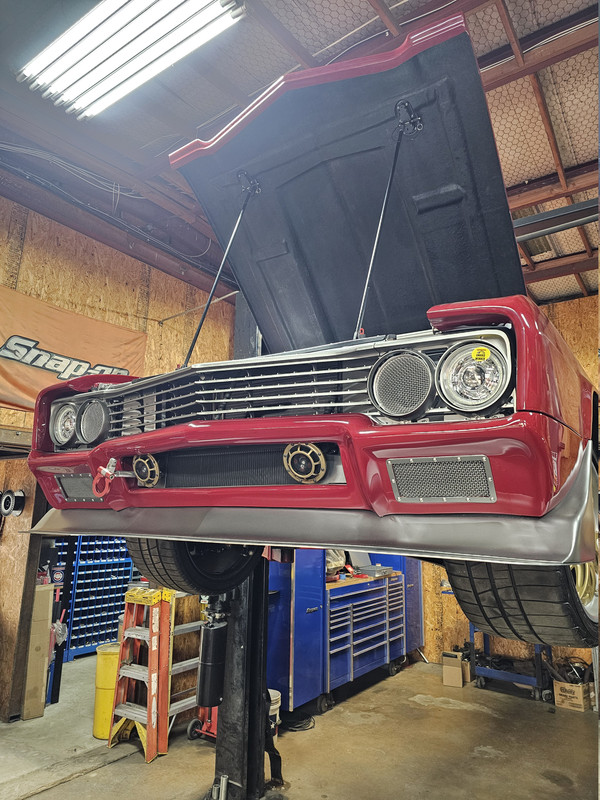
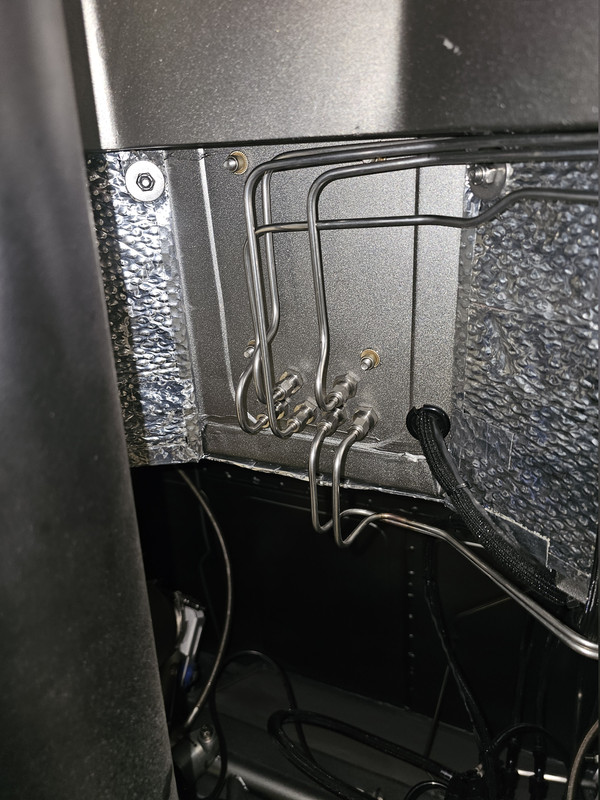
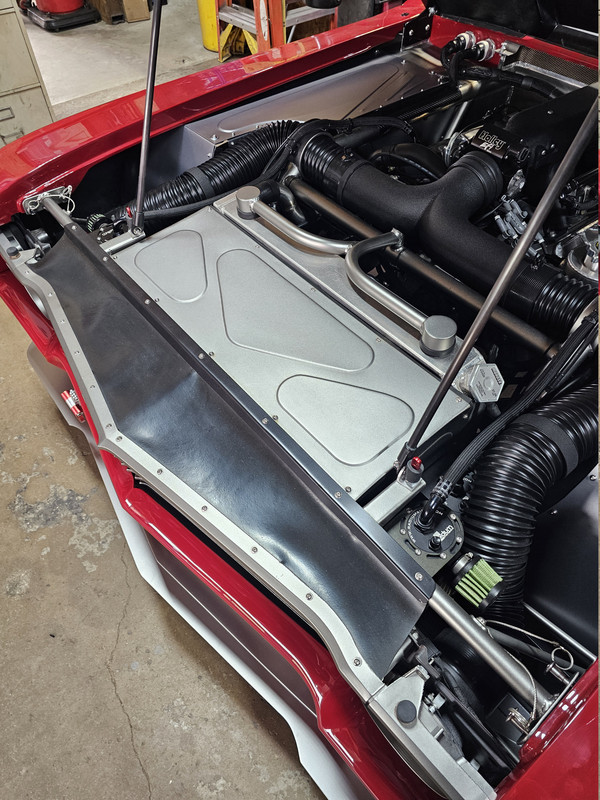
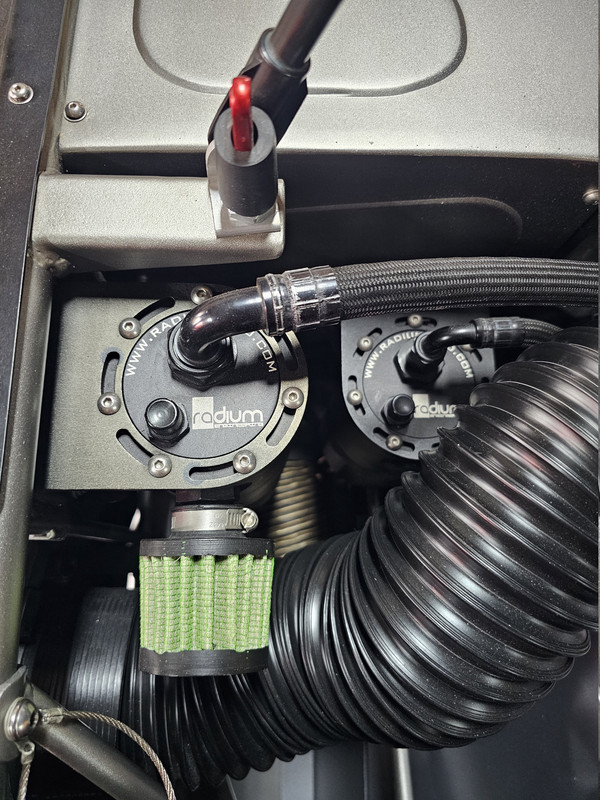
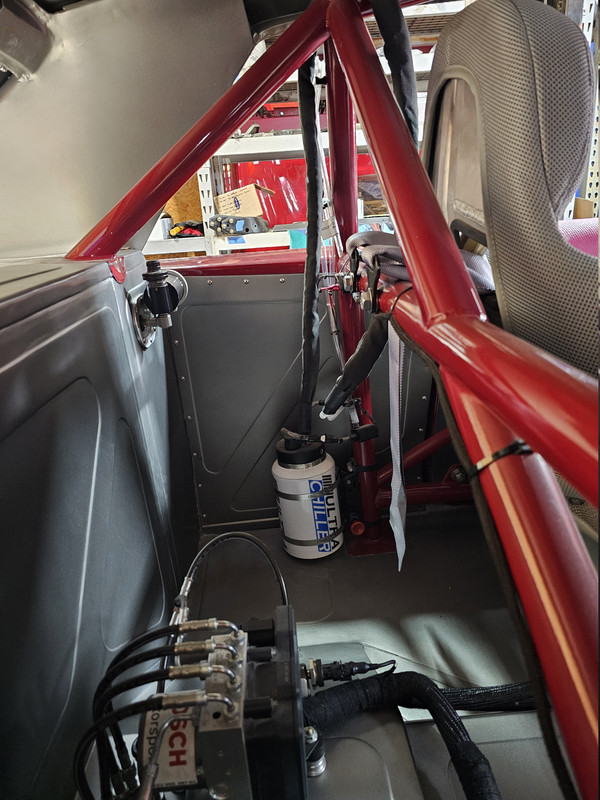
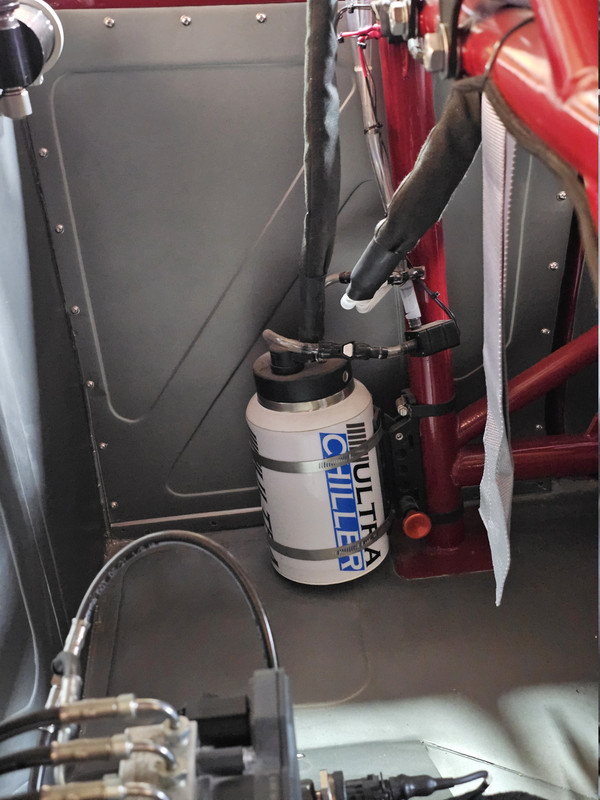
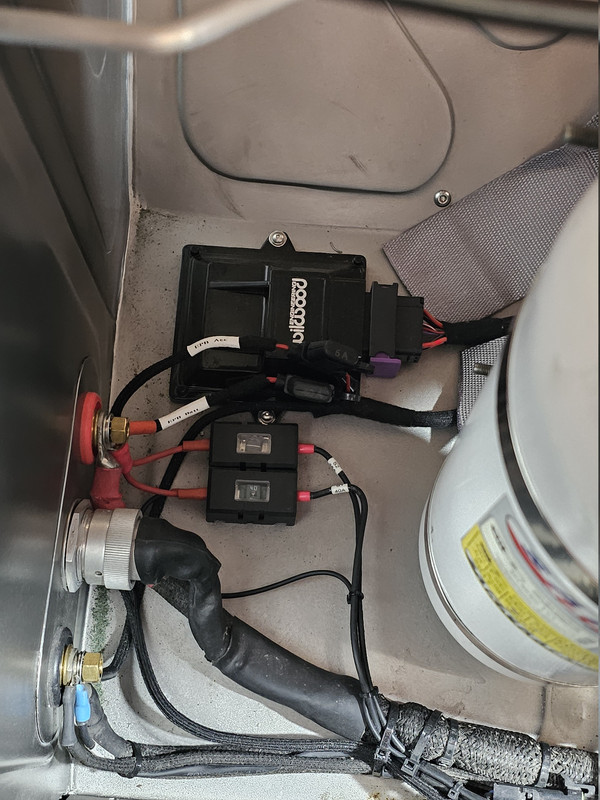
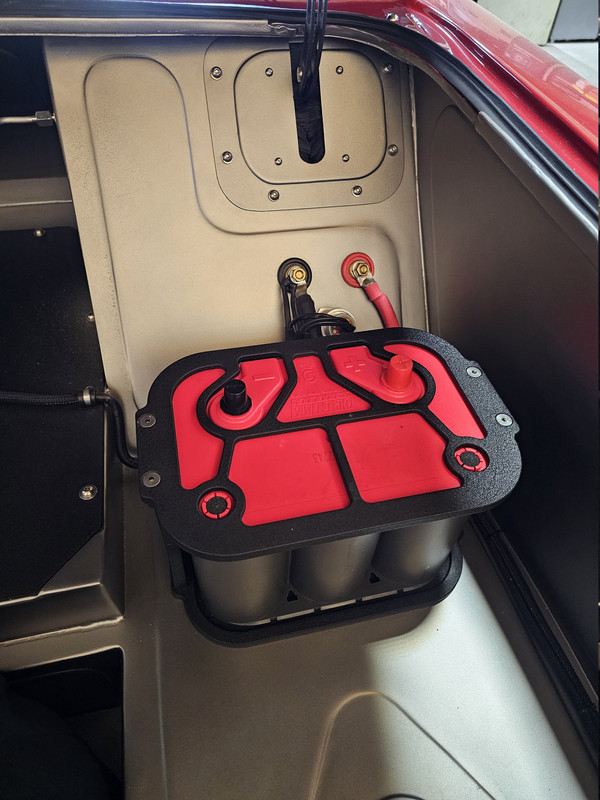
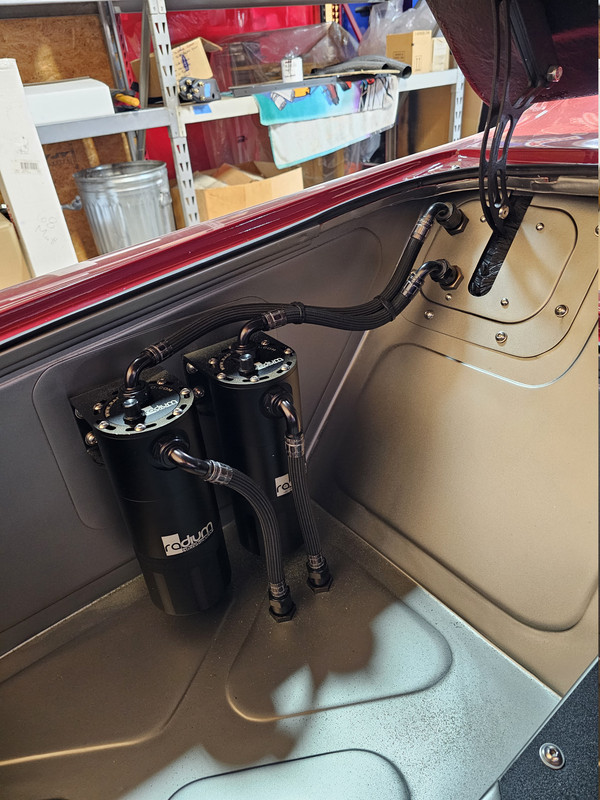
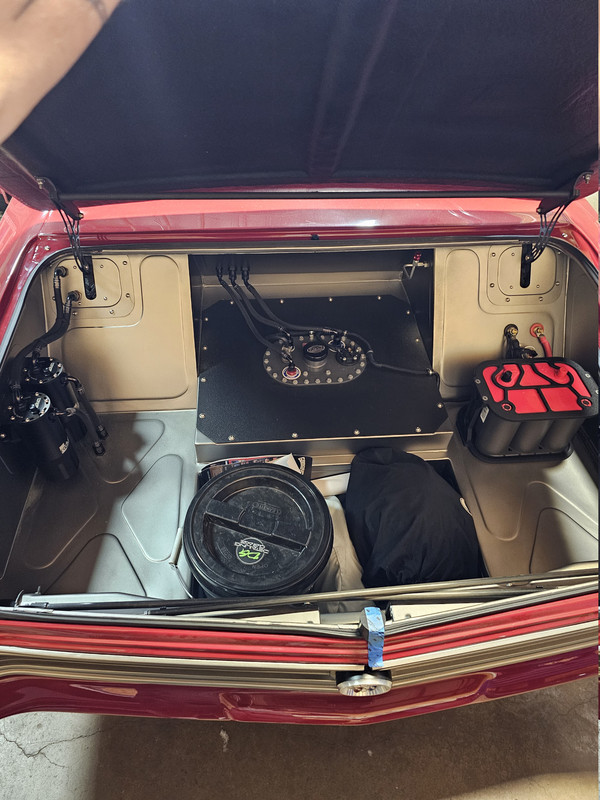
Last post by Ryan Kennedy - Apr 26, 2026, 02:11 AMSo here's where we're at. General progress pics. Systems are coming together, more plumbing...lot more plumbing, exhaust exit, wiring is in there too but that's a post for later.
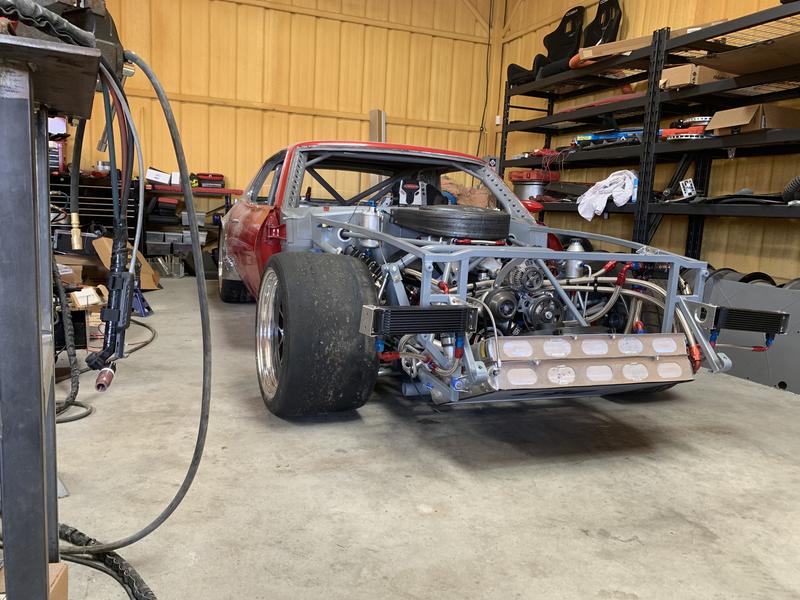
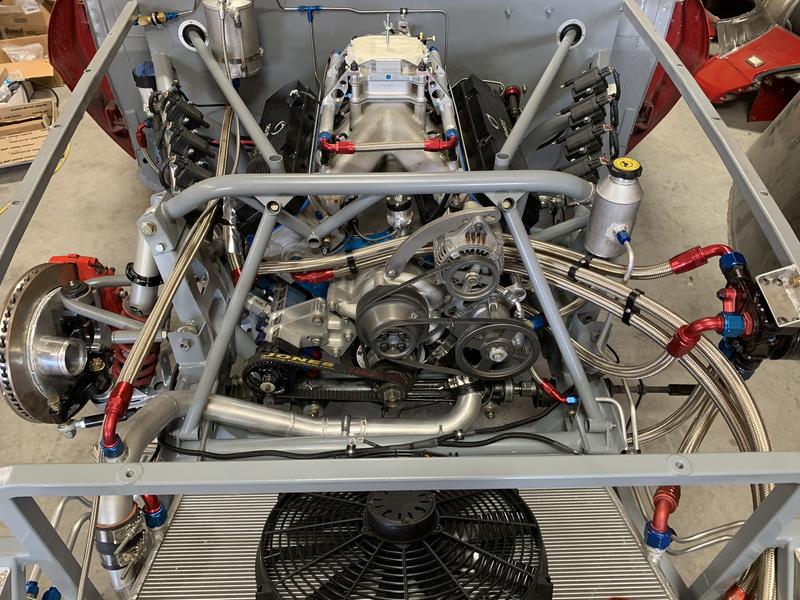
What all this is leading to is the dyno tune, setup, and first drive! This is how the car went out its first time. What a party! I mean, it was terrible but it was still a party! At this point I believe I was about 12 years into my track dedicated build.
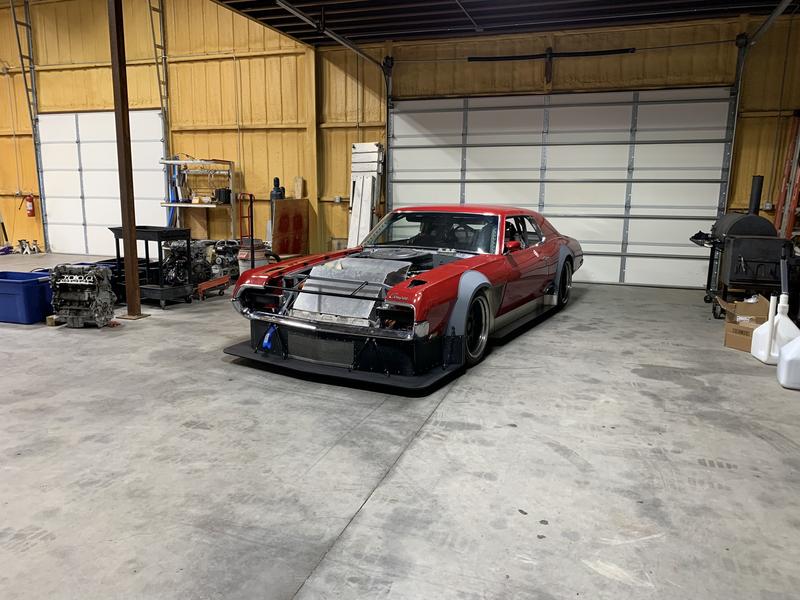
First impressions were just an assault on the senses. The last time I'd been on track was about two years and 400hp earlier. The most obvious and immediate issue was braking. ALLL the rear wheel hop. Background on the brakes.
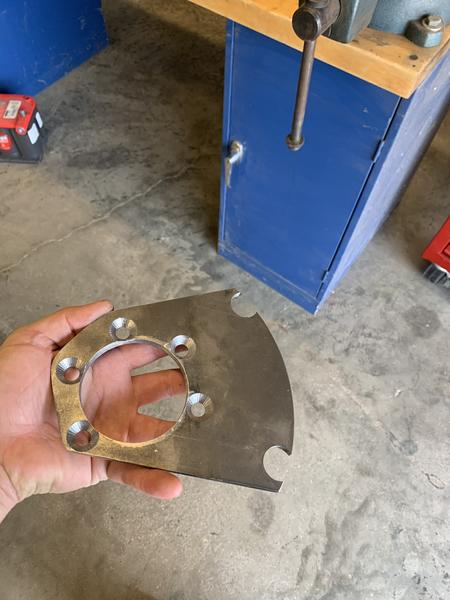
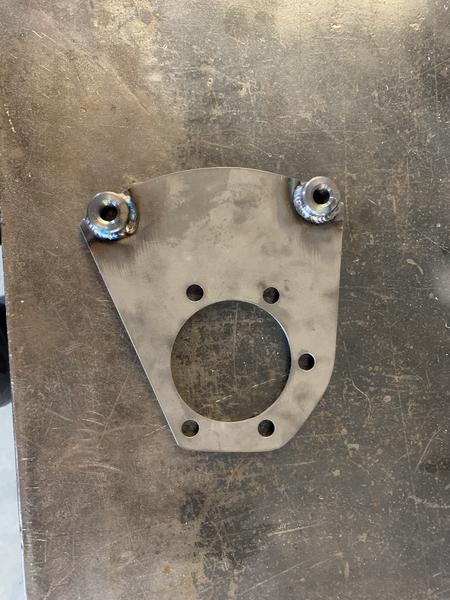
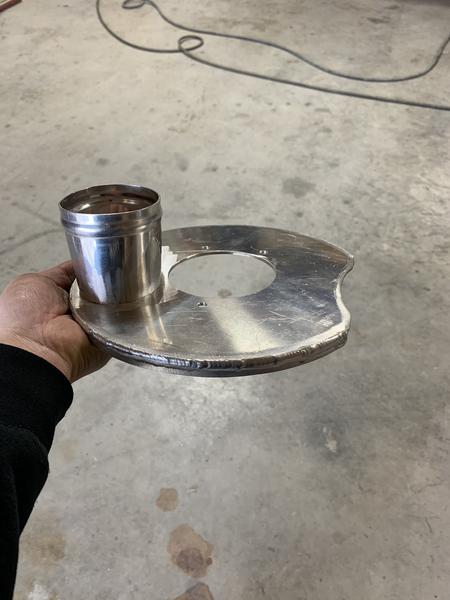
First go around was as budget as I could do them. I found a full set of 3rd Gen Viper 4-piston Brembo calipers, which are just an F40 caliper, radial mounted. I had a friend make me some caliper brackets to go with some brake duct plates I made.
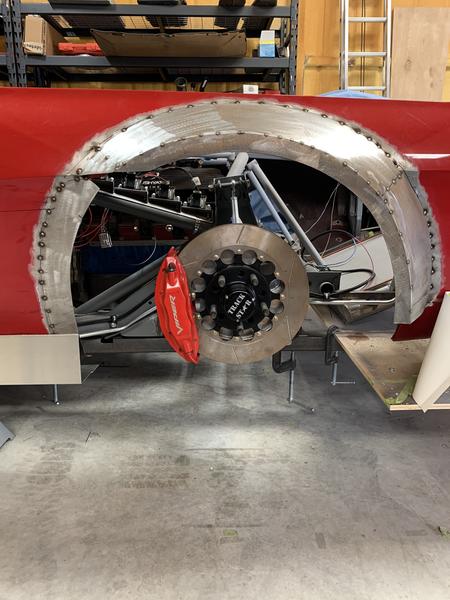
Talking with Ron, we had decided on master cylinder sizes, but there was concern. You would think that calipers from a factory car would be sized relatively on point...and you'd be wrong. The rear piston sizes are only a couple mm smaller than the fronts. The concern was that I wouldn't be able to take enough rear brake out without making the rear MC larger than the front, which we don't want.
This concern quickly became a reality. Even with a really mild rear pad and the crossbar dialed all the way to the front, the rear brakes were way too much and the TA rear suspension couldn't keep the wheels on the ground. In a moment of lust and weakness I decided to start over on the brake system. Braking issues are like cooling system issues - I....don't....want them.
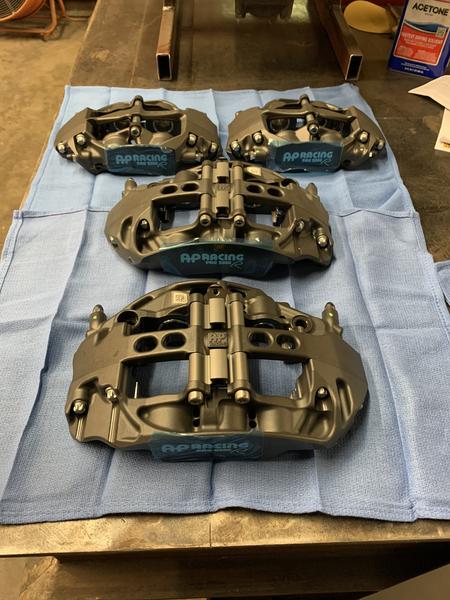
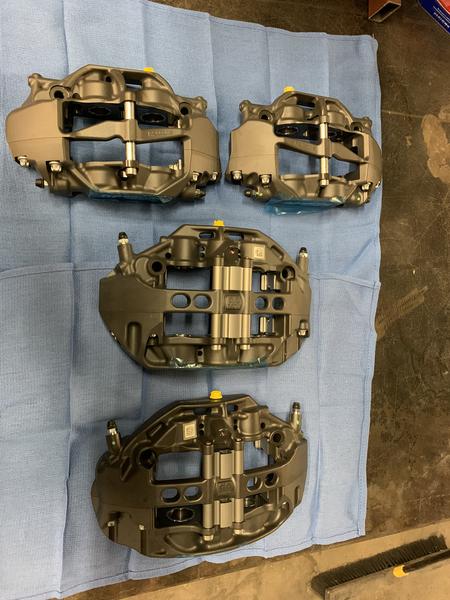
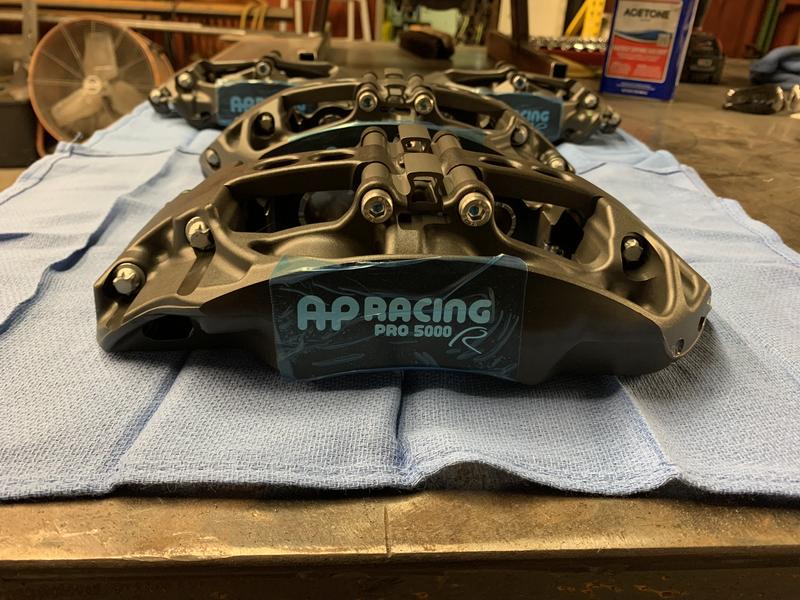
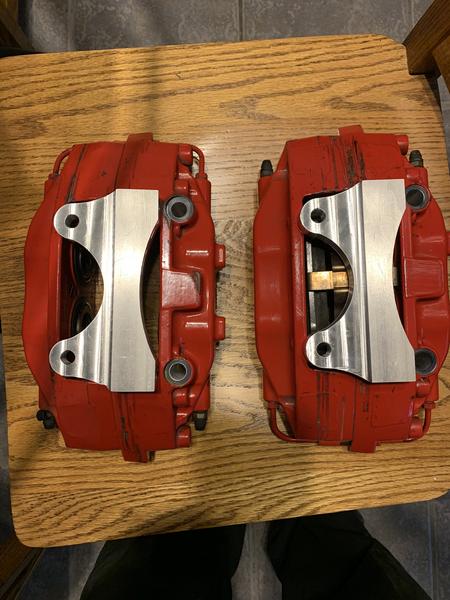
AP Racing Radical 6 piston front and 4 piston rear. With these I was able to fit a little larger 14-1/4" rotor under the 18" wheel.
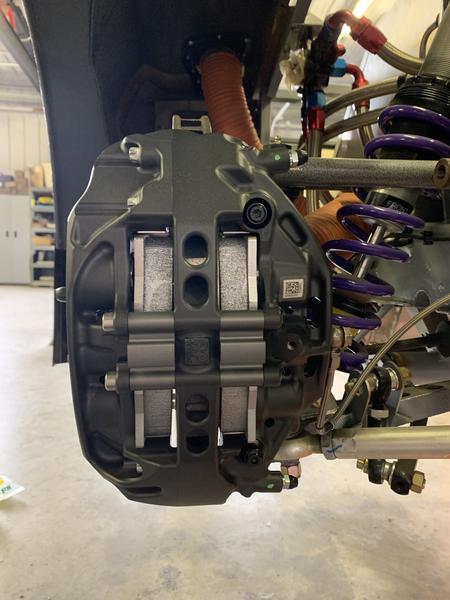
25mm of brake pad....
The front setup was easy. The rear though...the rear comes with some more uuhem...changes. Scope Creep at its finest.
What all this is leading to is the dyno tune, setup, and first drive! This is how the car went out its first time. What a party! I mean, it was terrible but it was still a party! At this point I believe I was about 12 years into my track dedicated build.
First impressions were just an assault on the senses. The last time I'd been on track was about two years and 400hp earlier. The most obvious and immediate issue was braking. ALLL the rear wheel hop. Background on the brakes.
First go around was as budget as I could do them. I found a full set of 3rd Gen Viper 4-piston Brembo calipers, which are just an F40 caliper, radial mounted. I had a friend make me some caliper brackets to go with some brake duct plates I made.
Talking with Ron, we had decided on master cylinder sizes, but there was concern. You would think that calipers from a factory car would be sized relatively on point...and you'd be wrong. The rear piston sizes are only a couple mm smaller than the fronts. The concern was that I wouldn't be able to take enough rear brake out without making the rear MC larger than the front, which we don't want.
This concern quickly became a reality. Even with a really mild rear pad and the crossbar dialed all the way to the front, the rear brakes were way too much and the TA rear suspension couldn't keep the wheels on the ground. In a moment of lust and weakness I decided to start over on the brake system. Braking issues are like cooling system issues - I....don't....want them.
AP Racing Radical 6 piston front and 4 piston rear. With these I was able to fit a little larger 14-1/4" rotor under the 18" wheel.
25mm of brake pad....
The front setup was easy. The rear though...the rear comes with some more uuhem...changes. Scope Creep at its finest.
#14
Front Suspension & Steering Geometry for Track & Racing / Missing some steering feel-ext...
Last post by Mark Sawatsky - Apr 25, 2026, 10:41 AMI have double wishbone front suspension, rack and pinion steering, KPI is 11 degrees and caster is 5 degrees, tires are 315/30-18 and toe is 1/8 total toe in. The steering is way too light and I have tried an adjustable flow control valve on the power steering and it worked great on the road but made parallel parking impossible. Should I just increase caster to get some steering feel back?
#15
Client Projects & Tips – Tube Chassis / Re: 65 Buick Skylark
Last post by Scot McMillan Jr - Apr 24, 2026, 06:02 PM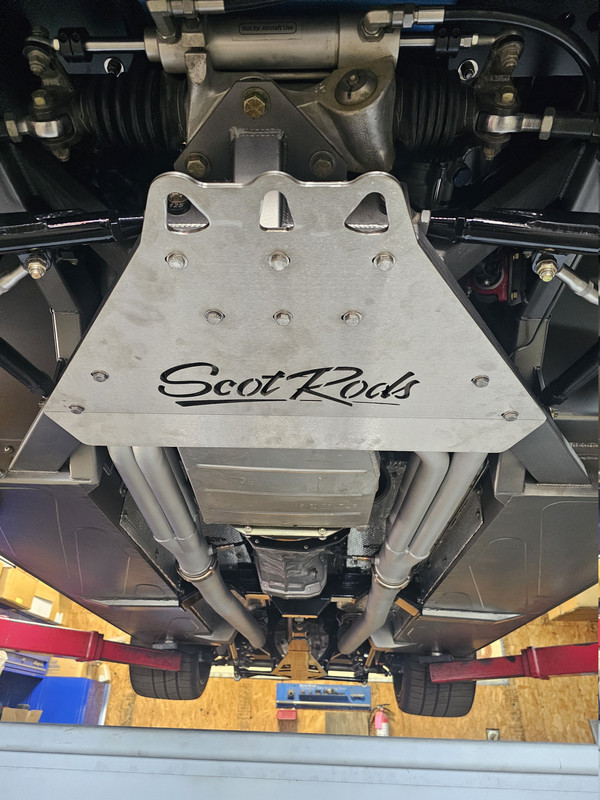
#16
Client Projects & Tips – Tube Chassis / Re: 65 Buick Skylark
Last post by Scot McMillan Jr - Apr 24, 2026, 06:00 PM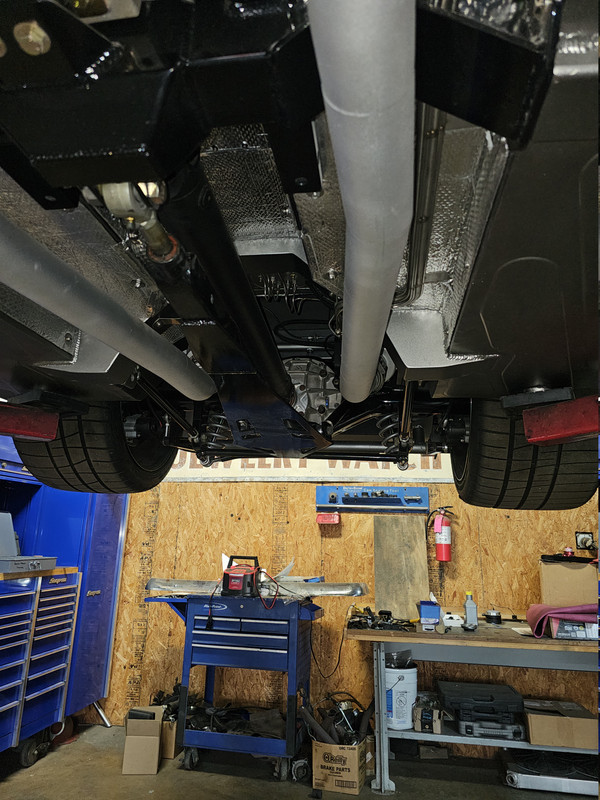
#17
Client Projects & Tips – Tube Chassis / Re: 65 Buick Skylark
Last post by Scot McMillan Jr - Apr 24, 2026, 05:57 PM
#18
Client Projects & Tips – Tube Chassis / Re: 65 Buick Skylark
Last post by Scot McMillan Jr - Apr 24, 2026, 05:54 PM
#19
Client Projects & Tips – Tube Chassis / Re: 65 Buick Skylark
Last post by Scot McMillan Jr - Apr 24, 2026, 05:42 PM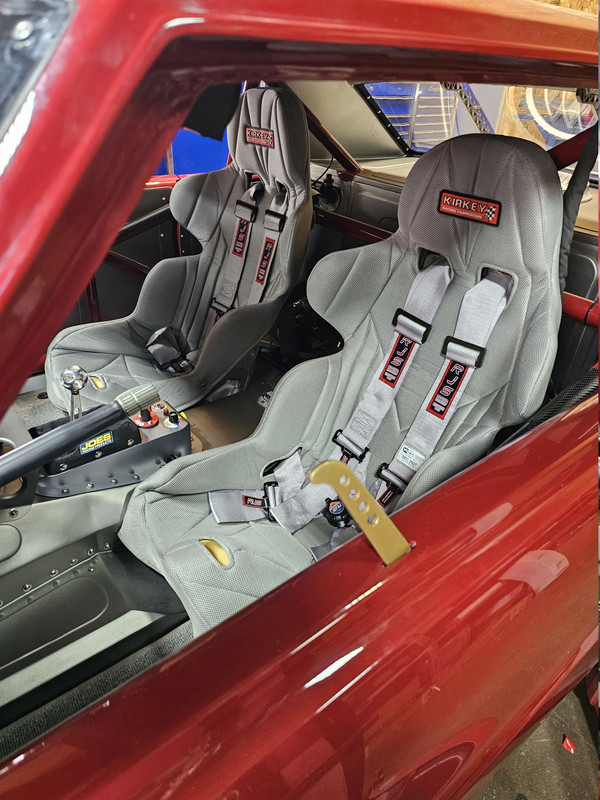

#20
Client Projects & Tips – Tube Chassis / Re: 65 Buick Skylark
Last post by Scot McMillan Jr - Apr 24, 2026, 05:37 PM